IntroductionYou can tell I've been doing too many college reports when I start my blog post with an introduction :P So I've been very silent on this project for a long time now. As you can see, the last time I posted was at the end of October last year. It's now June and I have made progress, but hardly as much as I would have wanted to. Without realizing, I started doing more and more things and that made me think I haven't got enough for a month's update this month, I'll write something next month. I then went on to think maybe I should just write an update to sum up what happened over winter. Time went on and without realizing it, it's now June and I still haven't said anything. I feel like now is the time to explain some things and say what's going on with this project of mine. Winter (November 2016 - February 2017)The basic gist is that my 3D printer started becoming more and more of a hassle. We came to the conclusion that the general temperature was the issue. Winter made it harder to get our bed up to temperature. Overall we kept having more failed prints and we hardly made any progress over the winter period. With constant wires needing re-soldering and having to keep re-adjusting the bed level, we decided to build an enclosure to try trapping the heat in. We thought this would allow us to get the bed up to temperature and allow for better layer adhesion. This was the case, until spring came around. Spring issues (March - May 2017)Now that the general temperature was rising, I started to encounter issues with... you guessed it, over-heating. The 3D printed ABS parts that were part of our printer started melting and coming apart. We tried changing the hot-end holder from our previous metal hose-pipe make-shift solution to the 3D printed replacement part I got last year, after our first one melted. Me and my father thought the original one melted cos back then the little fan on the hot-end wasn't spinning and the heat produced to melt the filament for extrusion was also melting the ABS holder. Sadly it happened again, even with the fan working now. Other issues arose, such as the brackets for the bed melting, expanding and letting the barrings slide out and the z-axis barrings holder snapping in two, slowed down the process of getting 3D printed parts done. What have I actually been doing all this time then?It's not that I haven't got anything to show from all this time of occasionally being able to print, and most times not, but I still don't feel like I've made much process. This is especially true for new parts. I still haven't got any one part complete yet. I am close to completing the palm and fingers, but I haven't even finished the arms. I've decided to forget about the head for now and I've only just started modelling the chest and shoulders of the suit. I'm doing more a more things now and hence spending less time on this project. This is mainly because of 3 things: College work, my social life & my other hobbies. I've only realised recently that I'm trying to do too many things and that I don't even have the time to learn more about game development, the one job I'm aiming for in life. In less then 2 weeks, I'll also be going to America for 4 weeks for an awesome holiday, but this just presses the issue of my time management even more. I'm gonna have to cut-down on hobbies and re-orient myself more towards my academic & job oriented future. Sadly this Iron Man project is one of those things that will need to be cut. So what's the plan?What I want to do is put this project on hold. Now it's my summer holiday, I should have more time to spend on such hobbies and projects like this one, but only after my 4 week trip to America. I'll be resuming this project in late July, early August, but on a much smaller scale. What I want to at least achieve is a fully functioning arm. I'll then be able to double this from my other arm too and have something complete to show for all my effort. Only at that point I'll decide what I want to do. Most people I know wanted me to get onto the chest piece ASAP. It was last year when I first heard this. Since then the collectors edition Iron Man helmet came out which is pretty awesome. It doesn't fold up, but if I got that and added it to my arms, I may be encouraged to complete the chest as well. It may be the case that after I finish the arms and hands, that may be the end to the project until I pick it up again after a few years, or maybe the distant future. I just want to at least complete the arms and hands. That is my goal now. The next time I'll post another update on this blog will probably be at the end of July, possible some time in August. I hope to carry on monthly from there until I complete the arms and hands. I expect my last post with the completion of the those parts being around September time, when college starts up again. So for now that's it. Look forward to a big update on what I actually have achieved since last October in my next post!
UPDATE: The project is now on hold. Return date of the project is unknown due to me working on game projects for my college work.
0 Comments
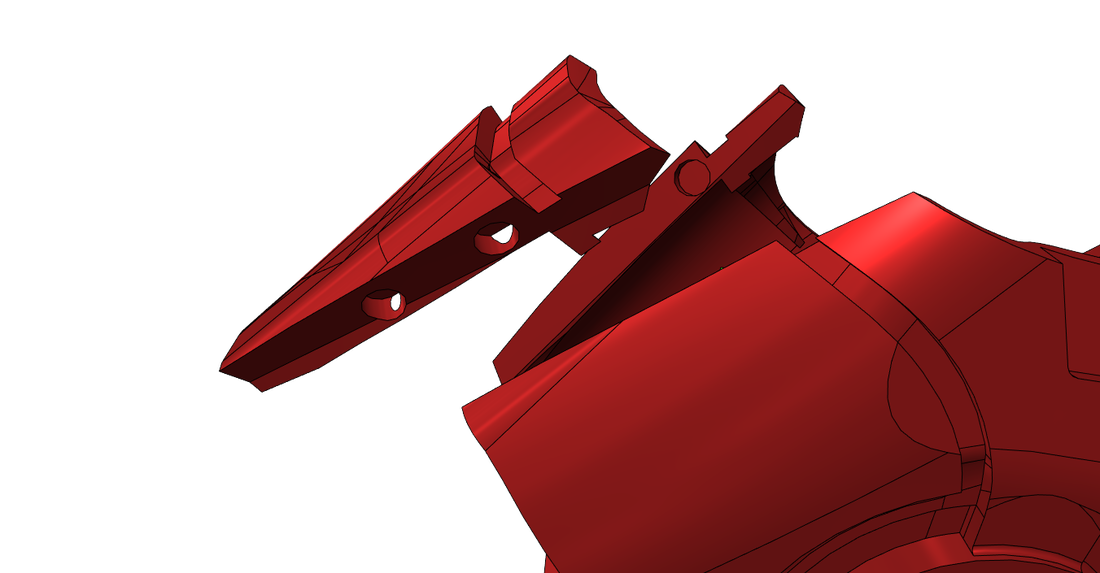
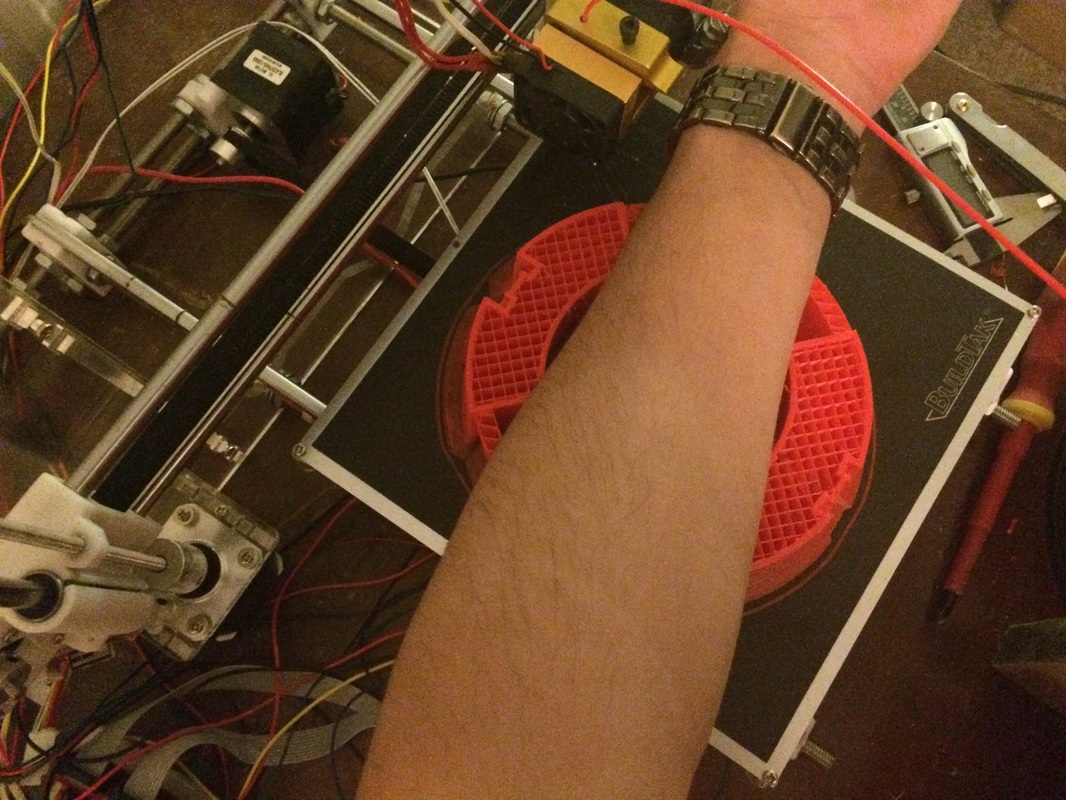
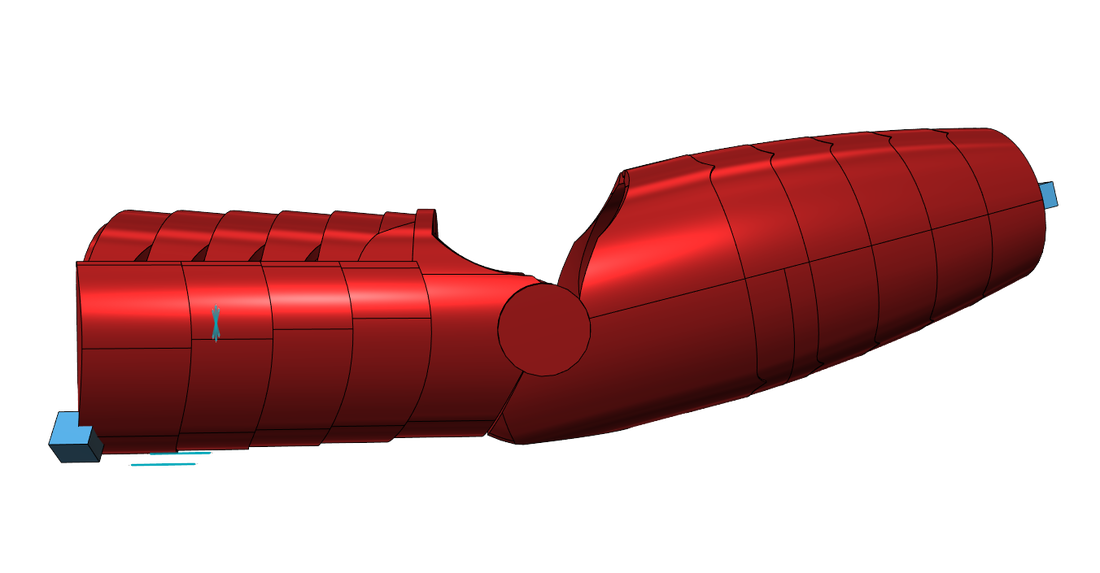
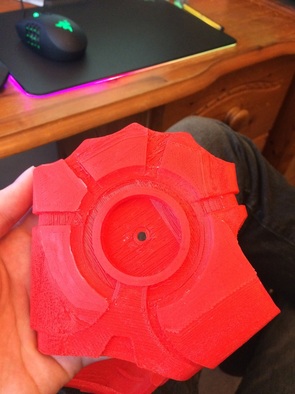
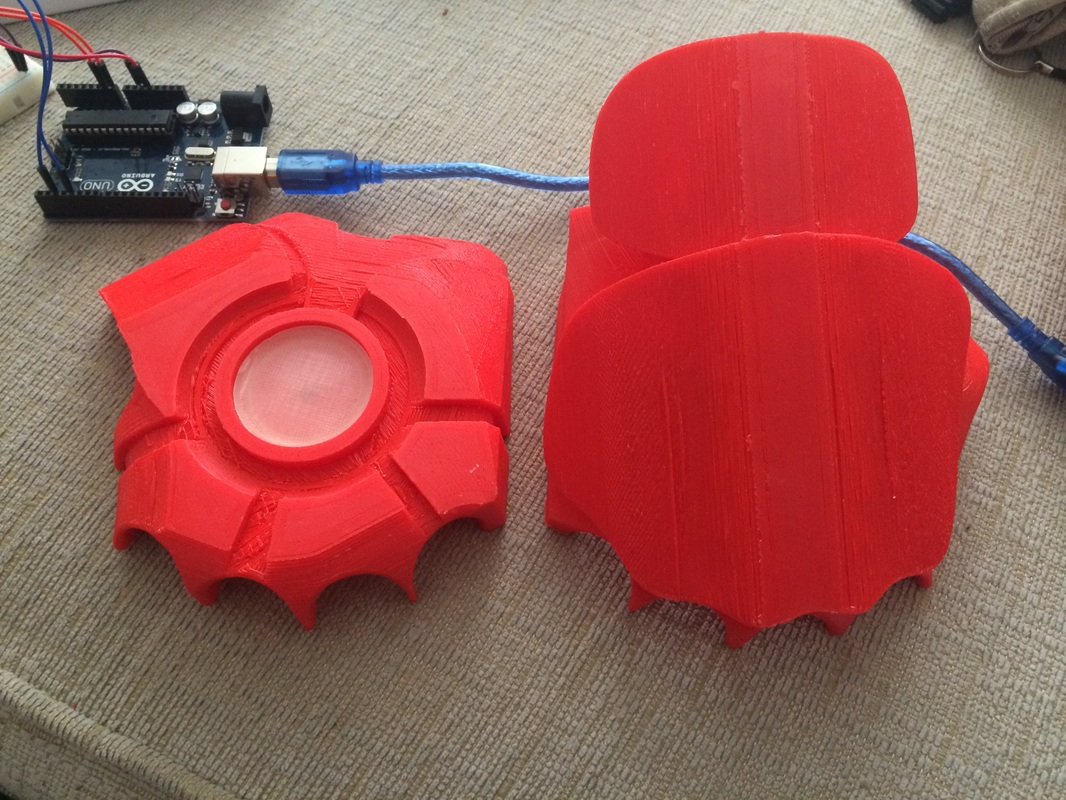
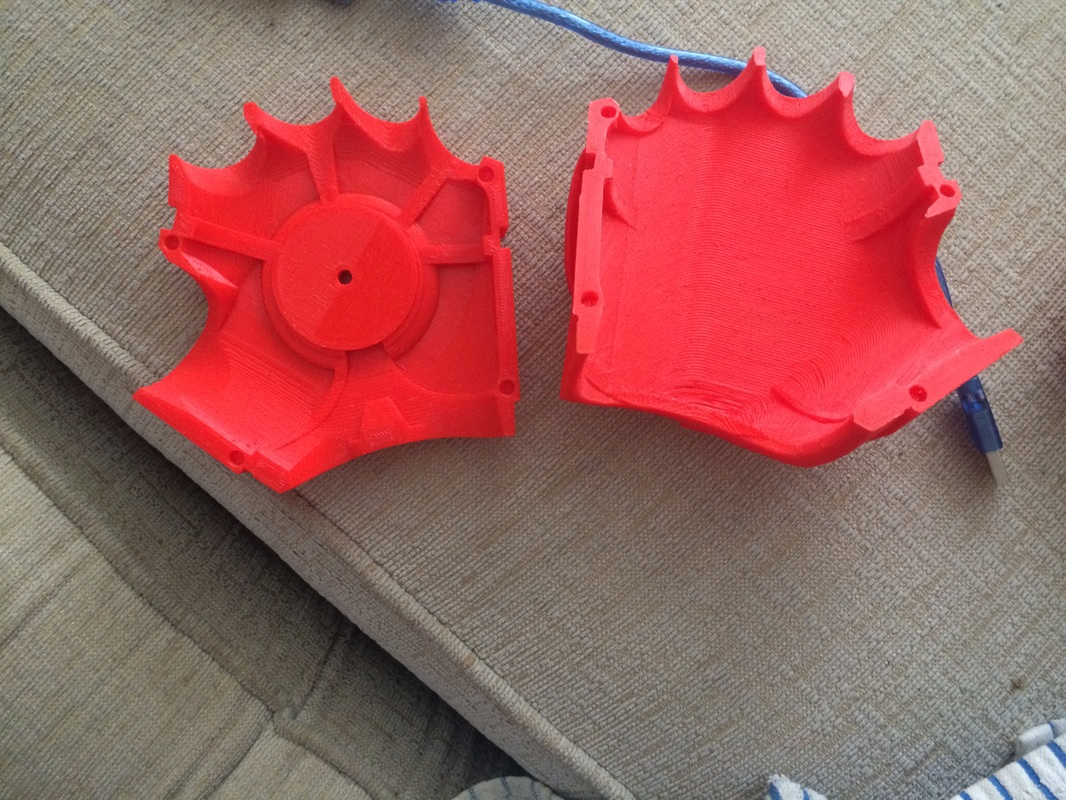
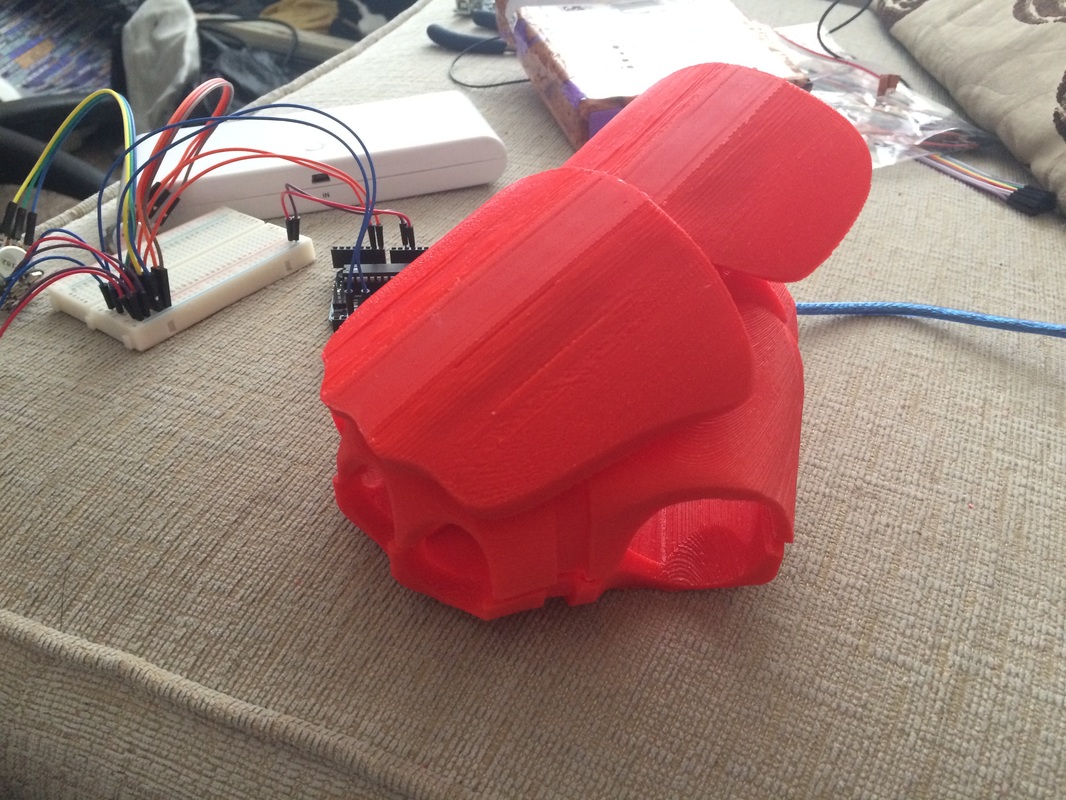
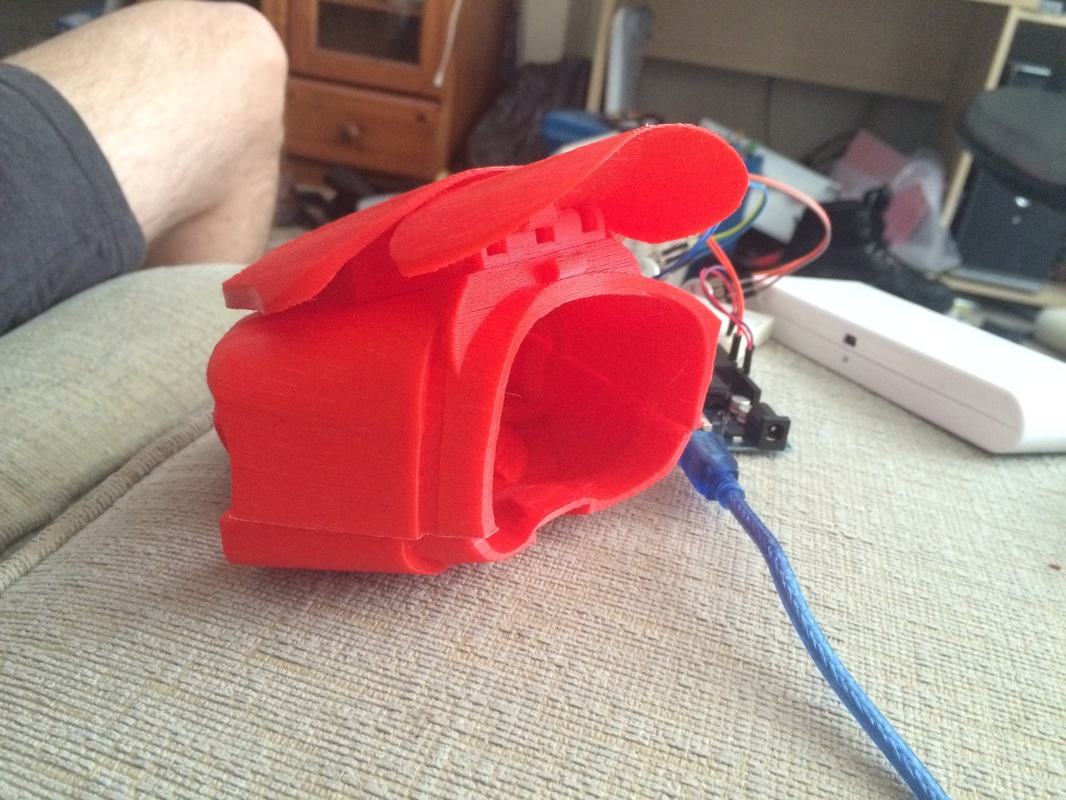
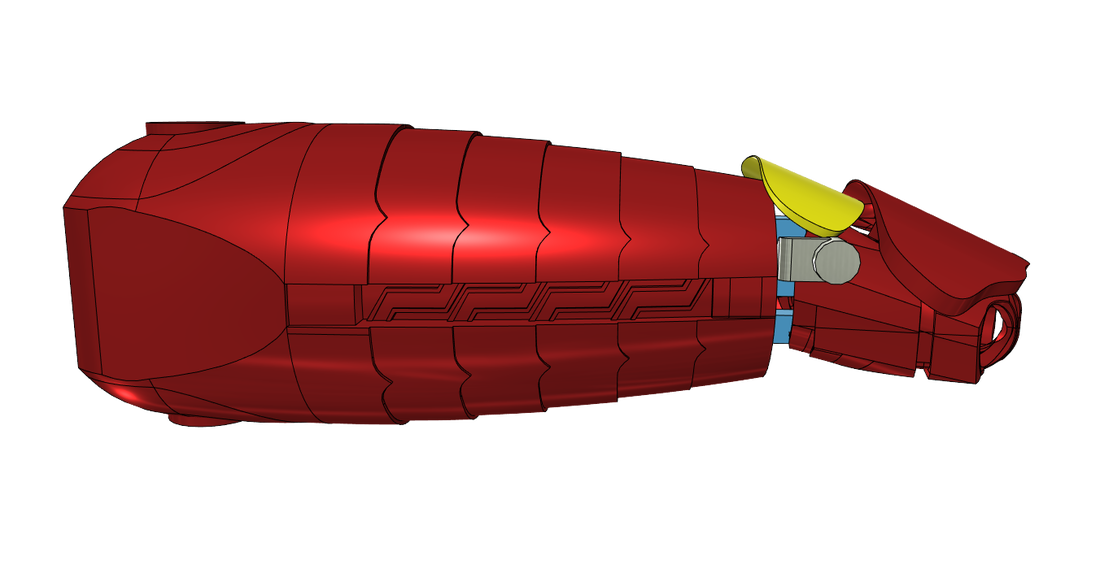
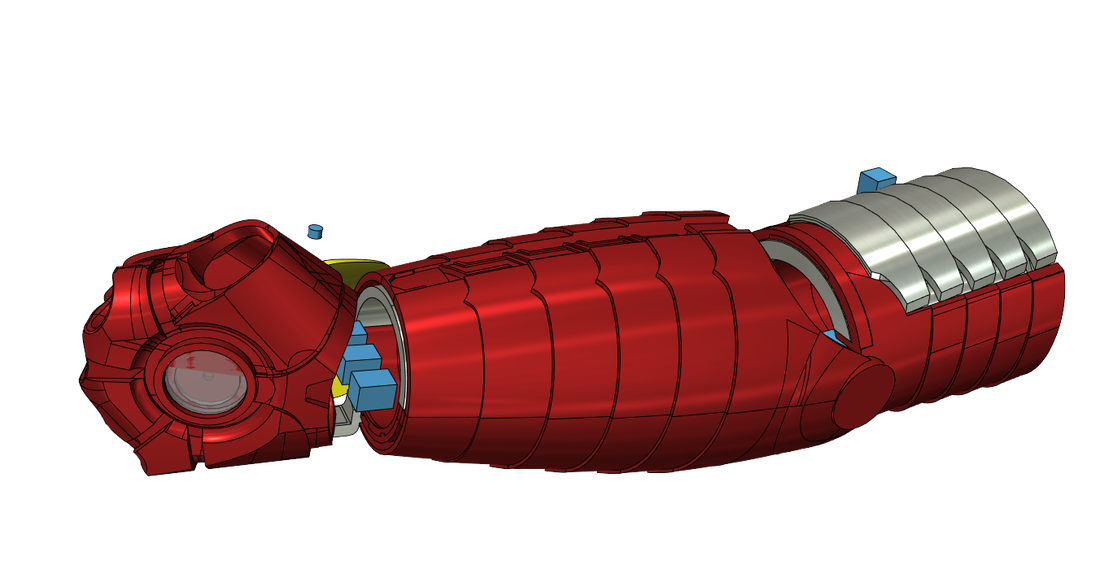
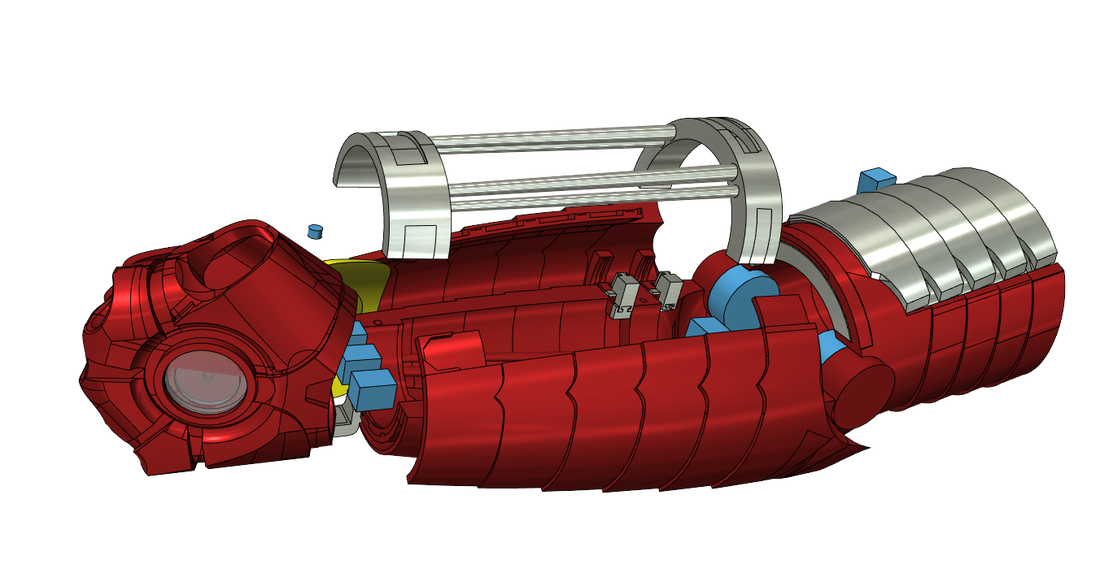
This month I have mainly worked on designing the arm and just finishing the little additions I needed to add to the palm model, getting all my parts ready for 3D printing. At the same time I mentioned last month that I will be 3D printing the helmet, ready to show off this month. Sadly, I haven't finished 3D printing the helmet yet but I have done all the design work I can in the meantime. Designing the suit - The armLast month I had only made the basic tubes of the arms, so this month I spent most of my time completing this design. I have included all the features of the previous designs and even improved on some of them. And example of this is how I have made the bottom of the upper arm look even better. If you can remember from my July update post, I did a comparison between the original horrible upper arm underside design and the previous design, looking a lot better. All this was just a duplication of the lower arm's top and bottom designs. This time I spent extra time making a unique and nice looking design. 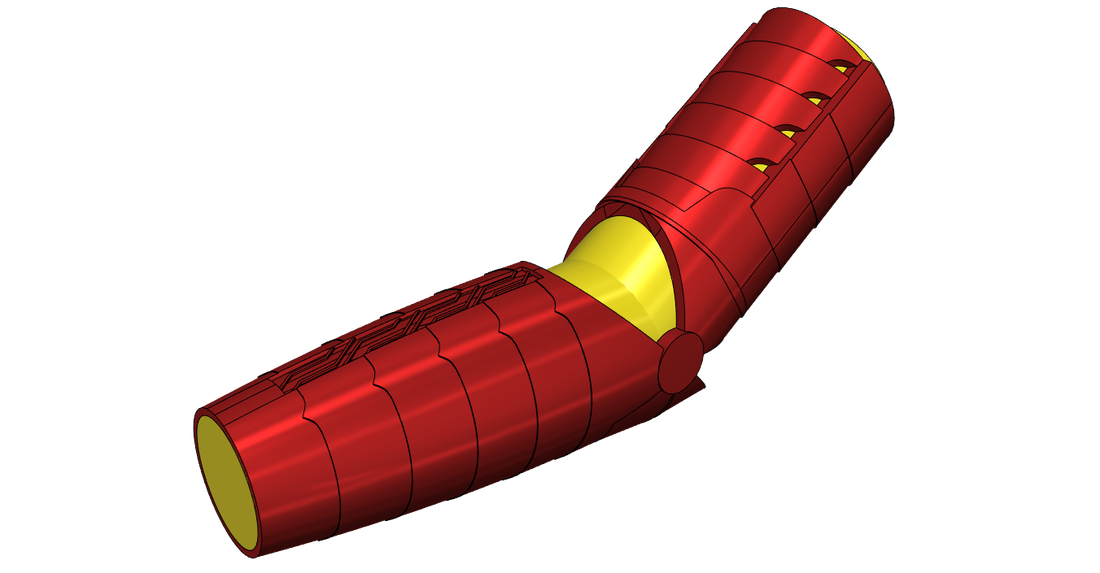 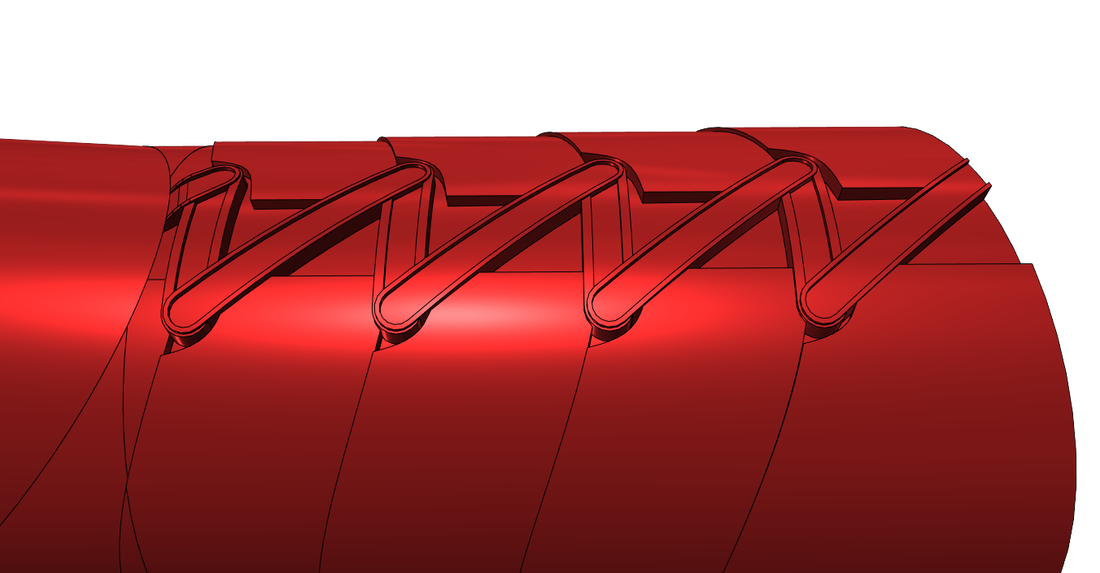  I currently haven't added any mechanisms but I know how it will work. I have split the model how I believe the mechanism will work even for the 3D printing sizing test. I plan the mechanism will work as follows: The lower arm will not change at all. The upper arm is, again, the part that breaks up and folds onto the lower arm. Instead of using the elbow joint this time, seeing I can actually straighten my arm now, I'll just have the upper arm to split into two and slide down the outsides of the lower arm, when bent straight. I'll be doing this by having a little part at the bottom of the upper arm to act as the mechanism base as well as being the part that joins the lower arm, creating the elbow joint. This base will have two parallel beams that will slot inside the inside of each side of each breakout piece. On the end of the parallel beams will be a block, with a rail at a right angle to connecting point of the beams. This rail will then connect to each breakout piece of the upper arm. What this will achieve is each of the two upper arm part to first fold out and then slide down the lower arm, when the elbow is straight. 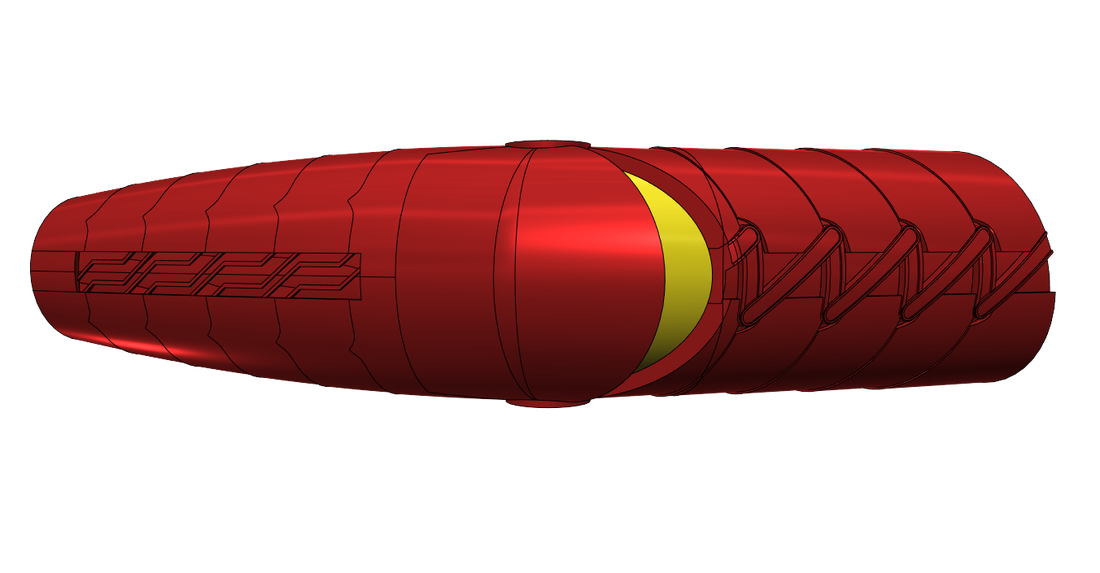  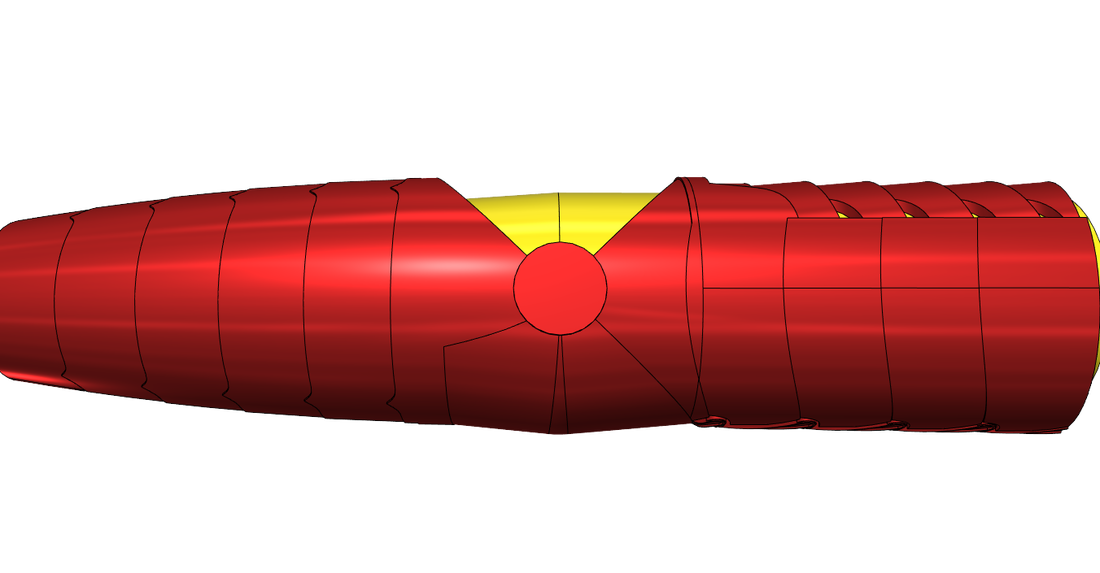 So, the arm is now completely done and ready for 3D printing. I am a bit worried about where the elbow joint it right now and that I need to stretch/squish the upper and lower parts to alter the length of each part. Hopefully I won't need to change it or if so, just do a simple all-direction scaling of the arm. Designing the suit - The palmI haven't been able to do much about the palms this month. All I have done since then is add 3 holes in the palm and 3 on the part that comes off. This is where the magnets will sit and because of their size, they actually poke through the inside wall a bit. This shouldn't be an issue though because of the amount being so minor. The plan for how the breaking off piece will work is that the magnets should hold it in place quite well, but just for some extra strength I'll also add a hooks and loops area on the back side of the break-off and piece and the glove. Not only this but I'll also attack a little string between the glove and the break-off piece so if it does come off after swinging my arms around viciously, then they wont go flying and somehow end up in a little kid's eye. Hey, it's a possibility! The last thing I need to do to the palm design is add where the Inertial Measurement Unit will go. The only way to do this is to know the size of it but I currently haven't purchased the parts. As soon as I have I will measure them, create a model representing the part in the design file and carve out a hole for it to fit in. At that point, the palm will be complete. I will then be able to 3D print the final test version to make sure the parts fit before having it professionally 3D printed. 3D printing - Issues with speed and qualityThis month I am a bit lacking on what I have to talk about and there's a perfectly good reason for this. That being, the 3D printer is slow due to its cheapness and quality is lower the faster it gets. I have made each print go a bit faster to speed up the process the the quality got noticeably a bit less refined. On the other hand, one issue I was having was weak bonds due to each layer printing too slowly on large layers and by the time the 3D printer had gotten onto the next layer, the previous layer had already cool quite a lot. What I thought I could do is test print all my parts using my 3D printer and then have the final versions printed elsewhere. First I thought via an online 3D printing company based in the UK, but the price per piece is really high. After some time a friend reminded me that there is a 'MakerSpace' in Southampton that could possibly allow me to 3D print my final pieces fast and in high quality. I plan to visit the place some time soon to see what will be the final plan, but for now I just need to 3D print my test parts at home, using my own 3D printer. Yeah, about that... I'm really bottlenecked by my 3D printer's speed. What is happening right now is I complete a model, I send it to my dad's laptop at his house and he 3D prints it from there. Each print takes about 5 hours and he works almost all day so I get about 1 piece done each day. The trouble is, we just ran out of filament, hulting 3D printing for about a week. I bought some more on eBay, fromt he same seller as always, but this time all the filament just snaps apart like hard noodles! I'm just about to complain but anywho, this just makes the wait for filament even longer so I don't know how much longer it will be until I can 3D print again. I have only 3D printed about a 3rd of the pieces of the helmet, maybe half of them, but I still need to 3D print the lower & upper arms, the fingers and the hand once I have finished that design. 3D printing - Progress of the helmet 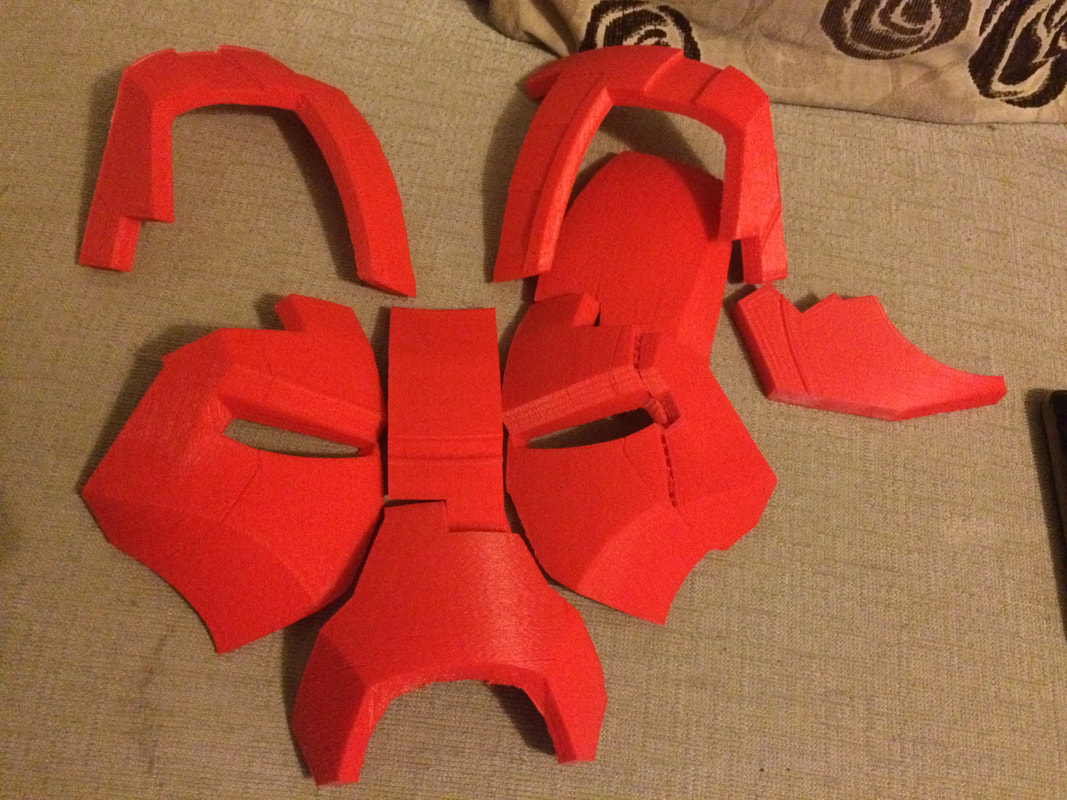  As for the helmet, it seems to be quit e bit big, but that's better than small because I'll actually be able to put my head inside without having to keep the helmet in two parts (due to the back piece securing the helmet one, yet also preventing me put it on when in place). All I need to do is measure how big each dimension is compared to my head and adjust accordingly in the helmet's scaling in the design files. Here are the parts of the helmet that have currently been printed. The summary
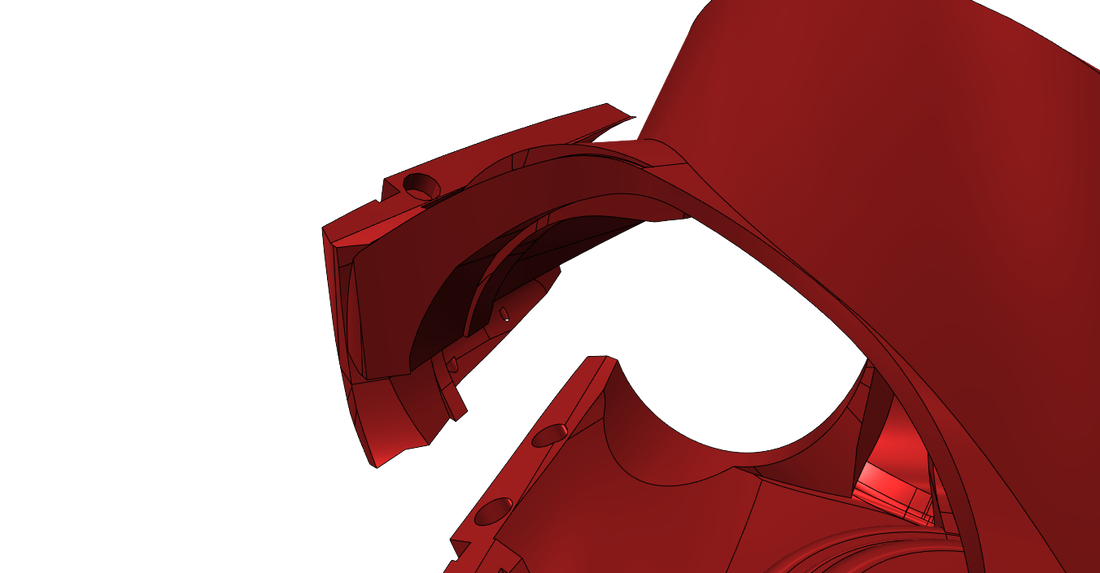
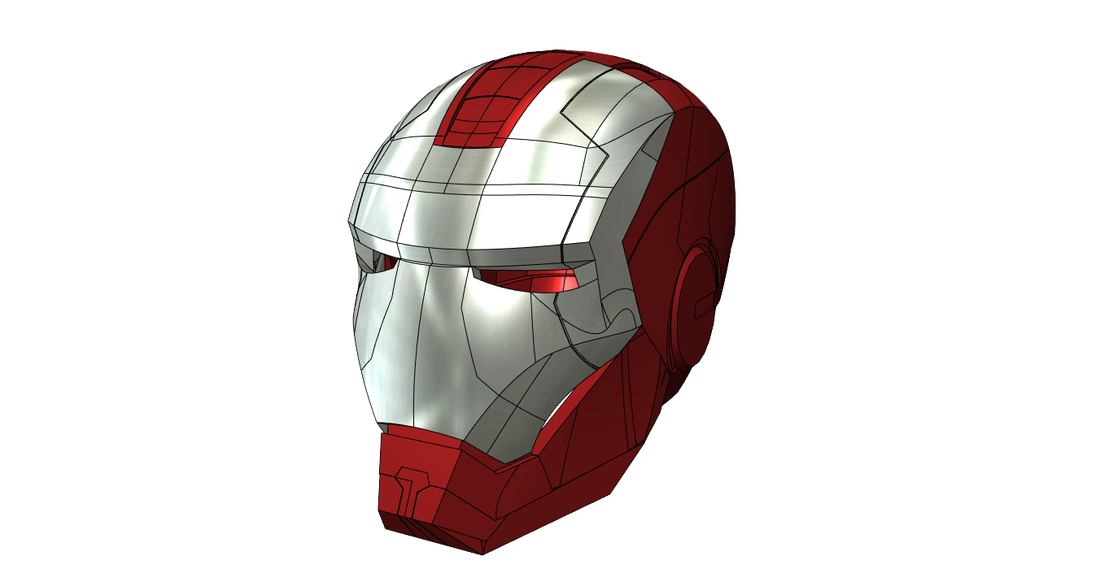
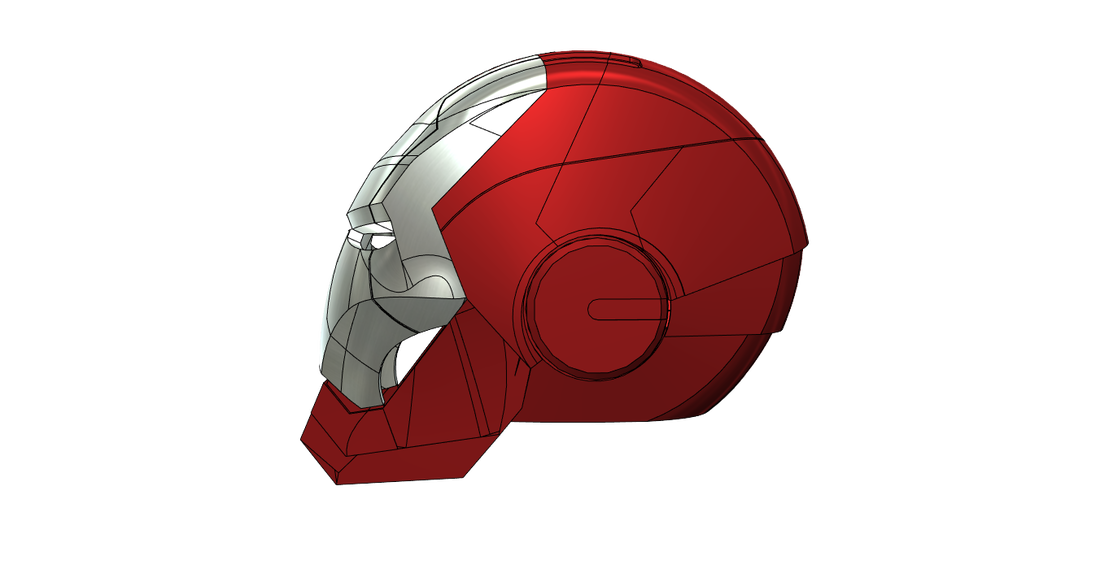
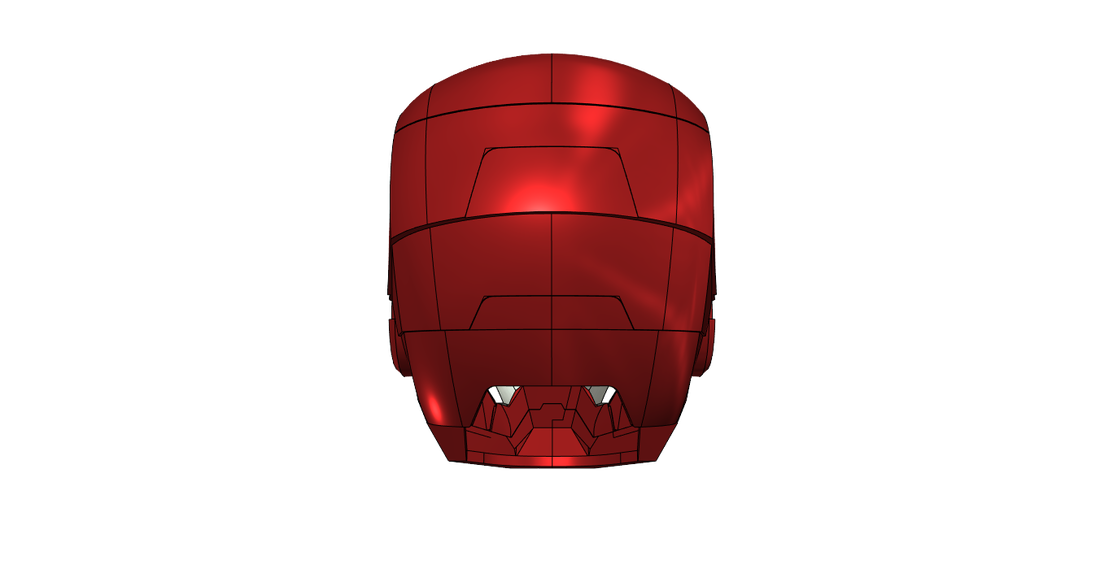
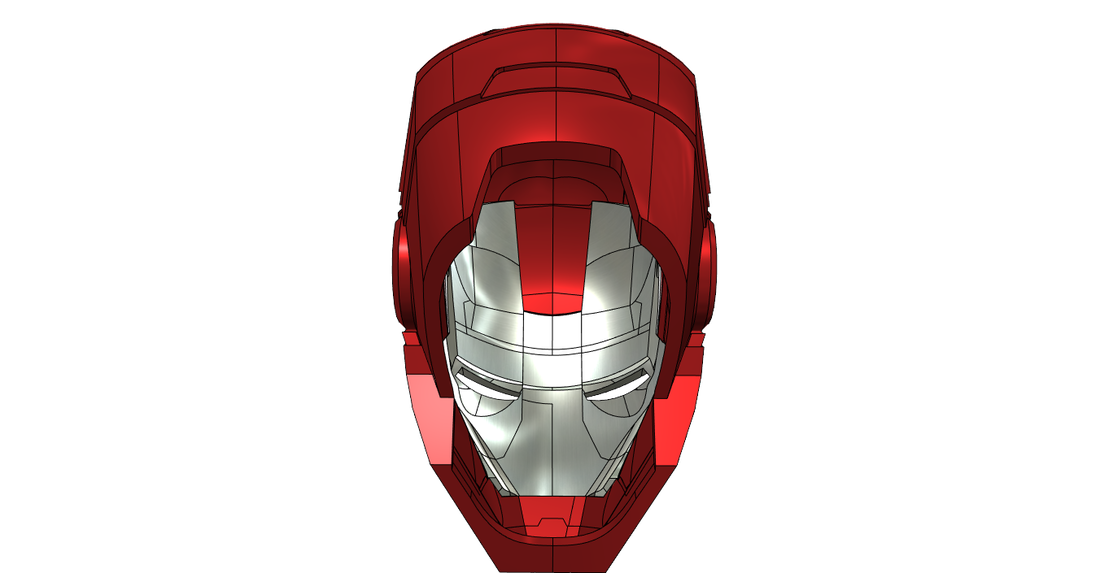
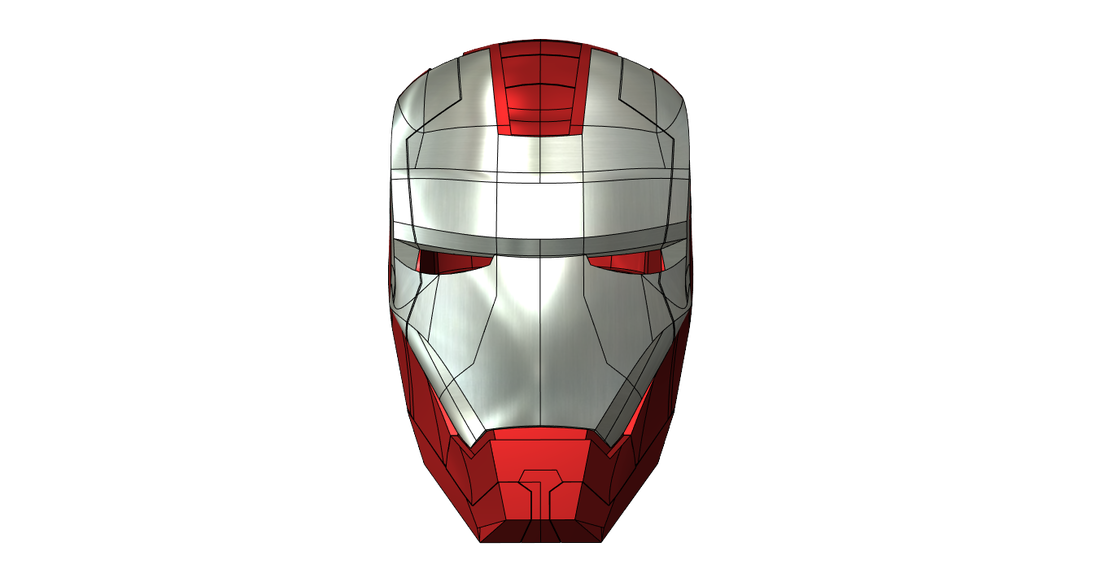
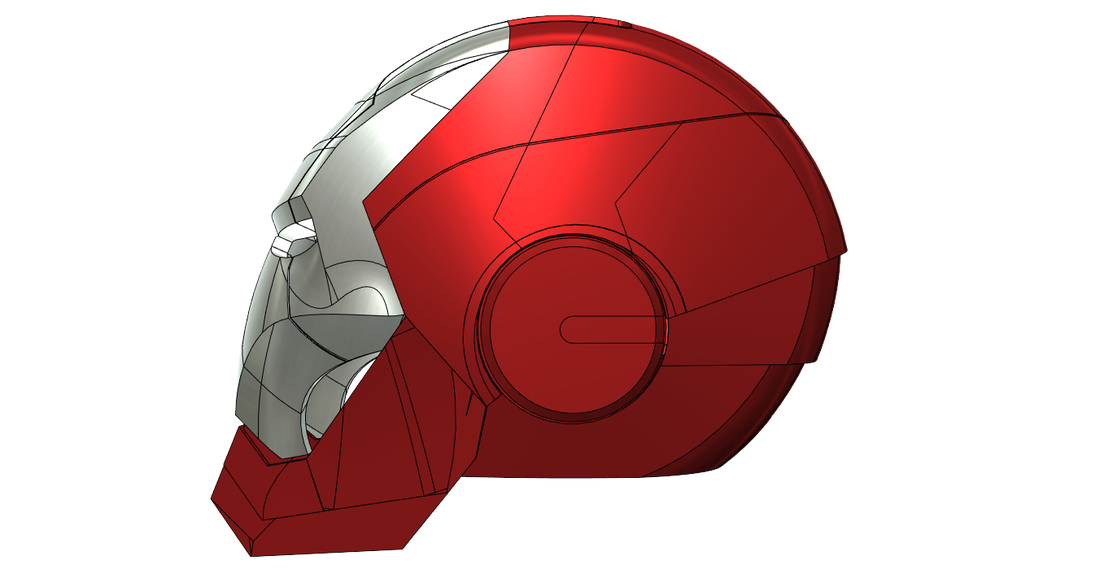
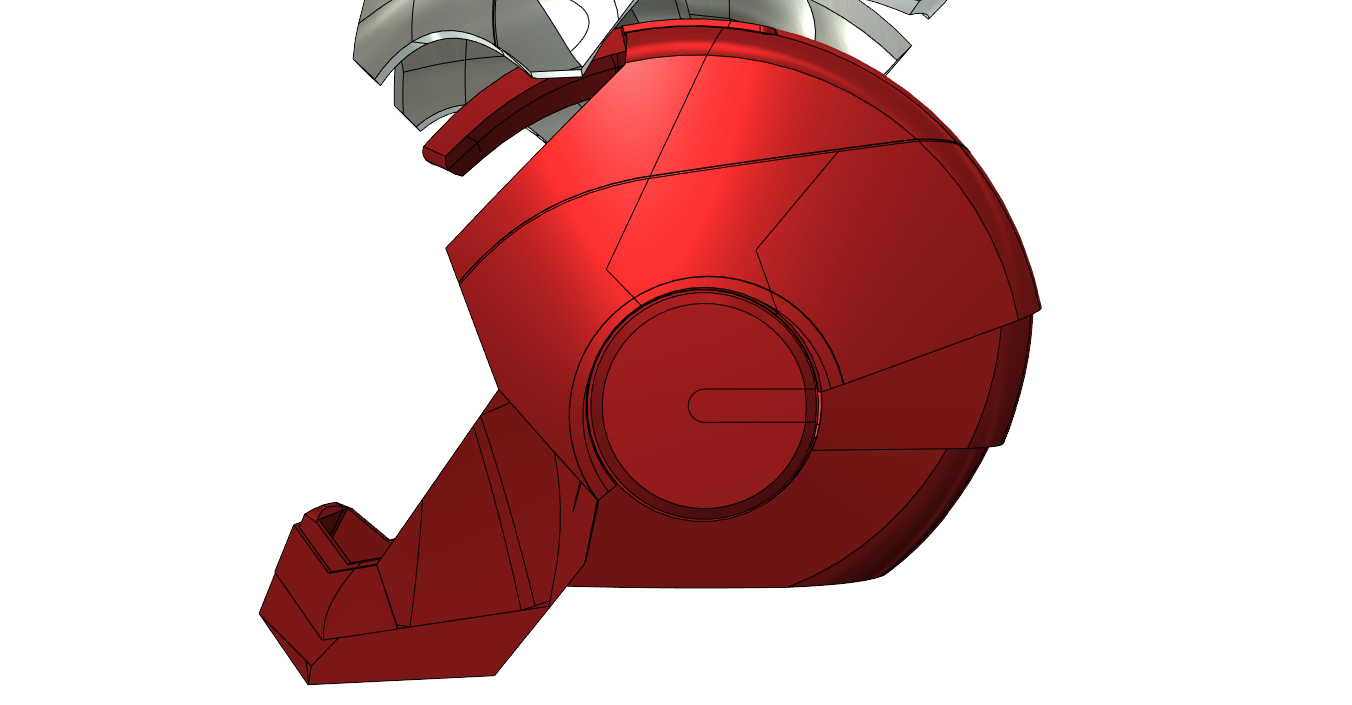
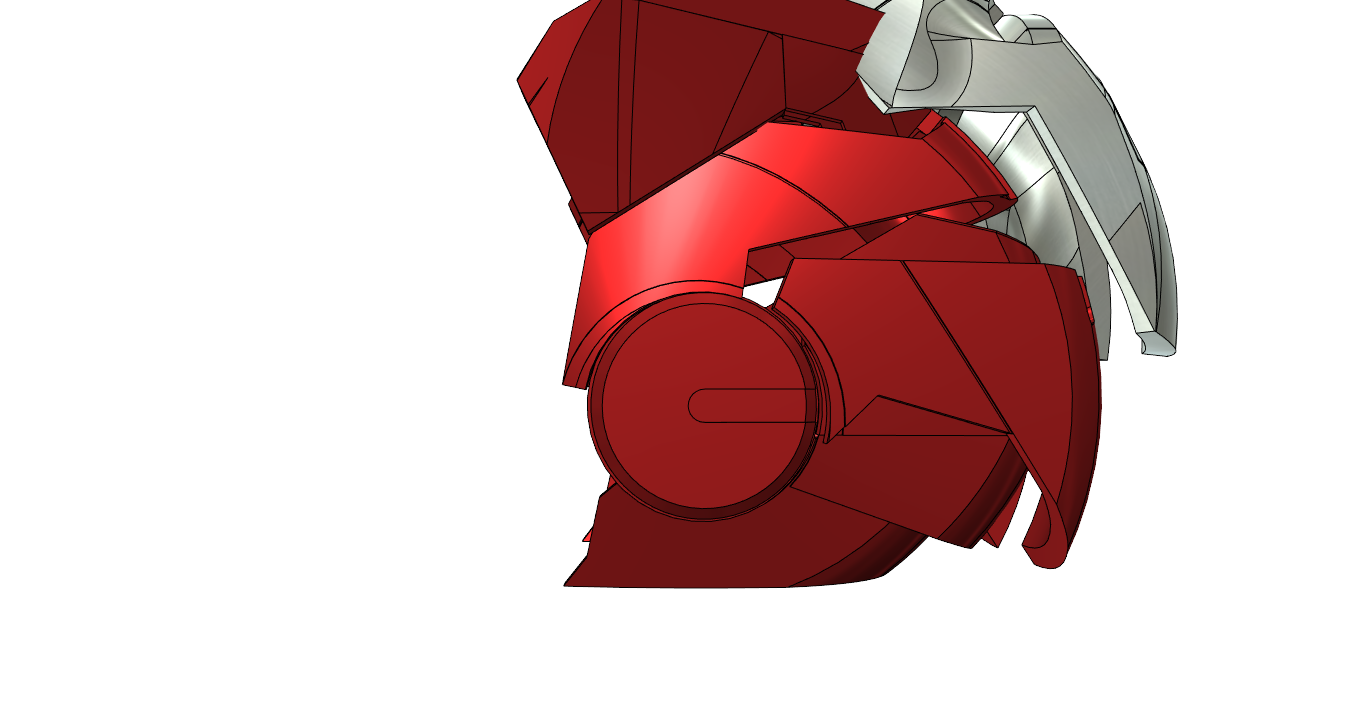
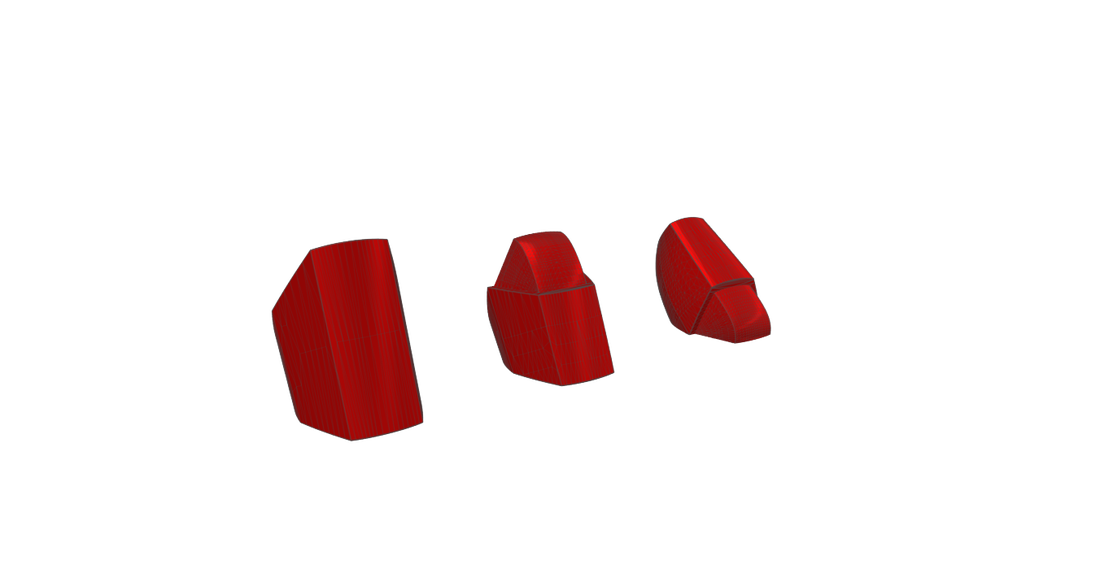
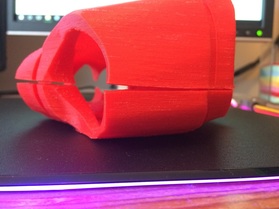
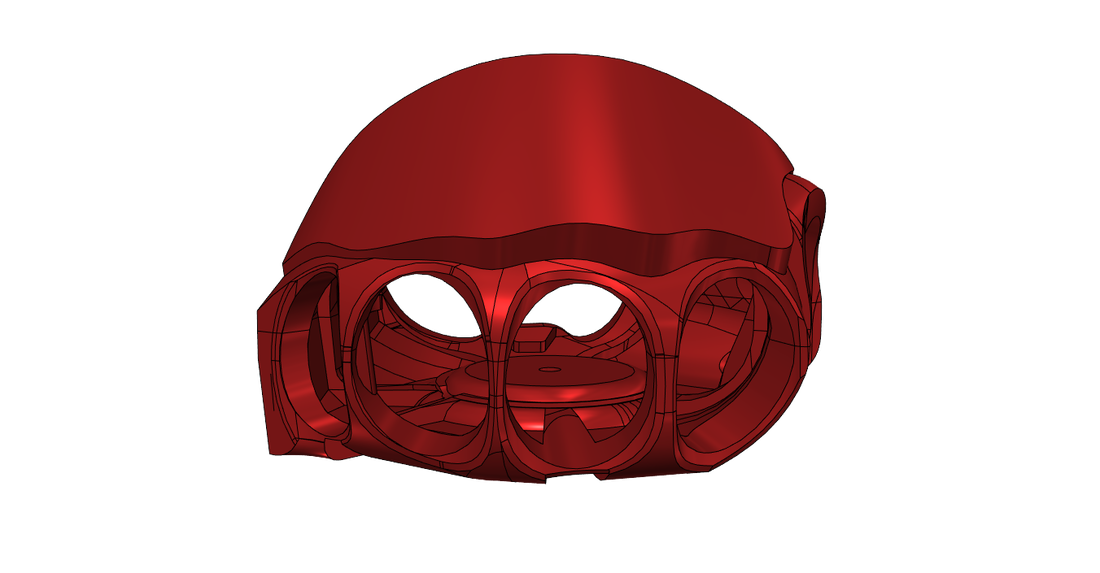
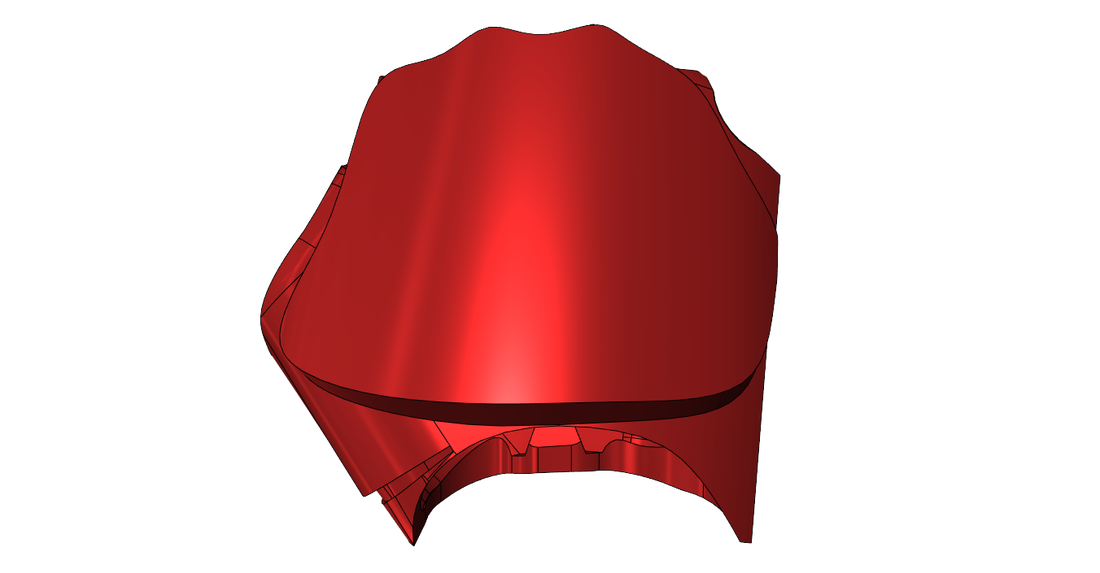
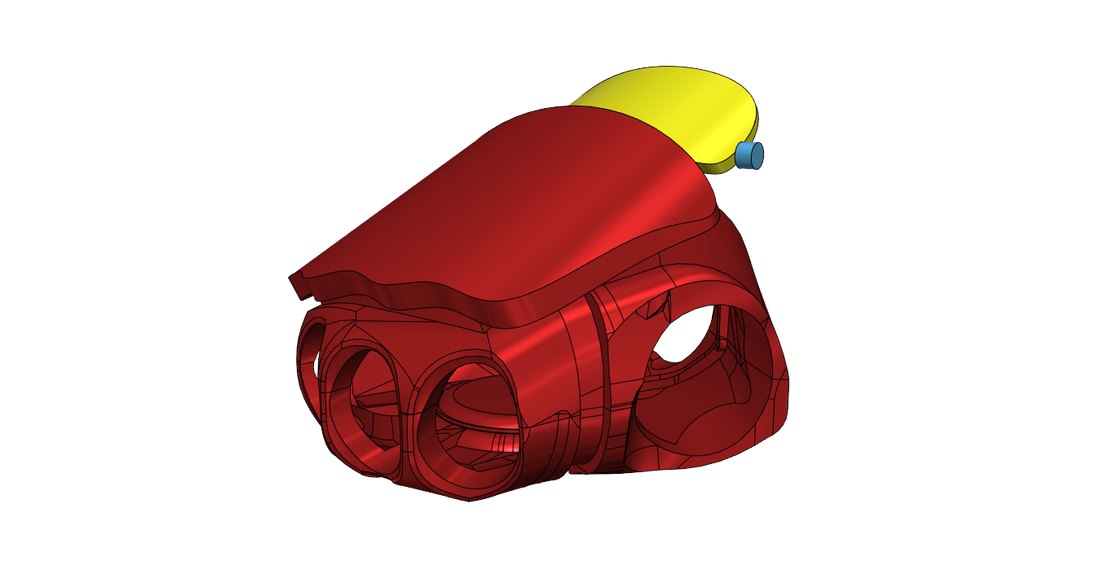
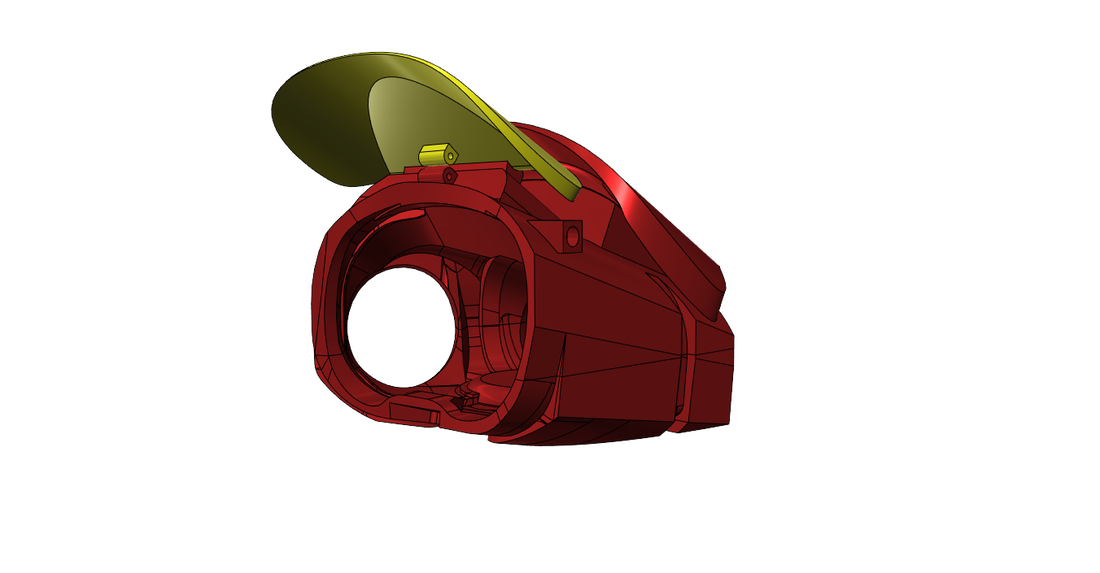
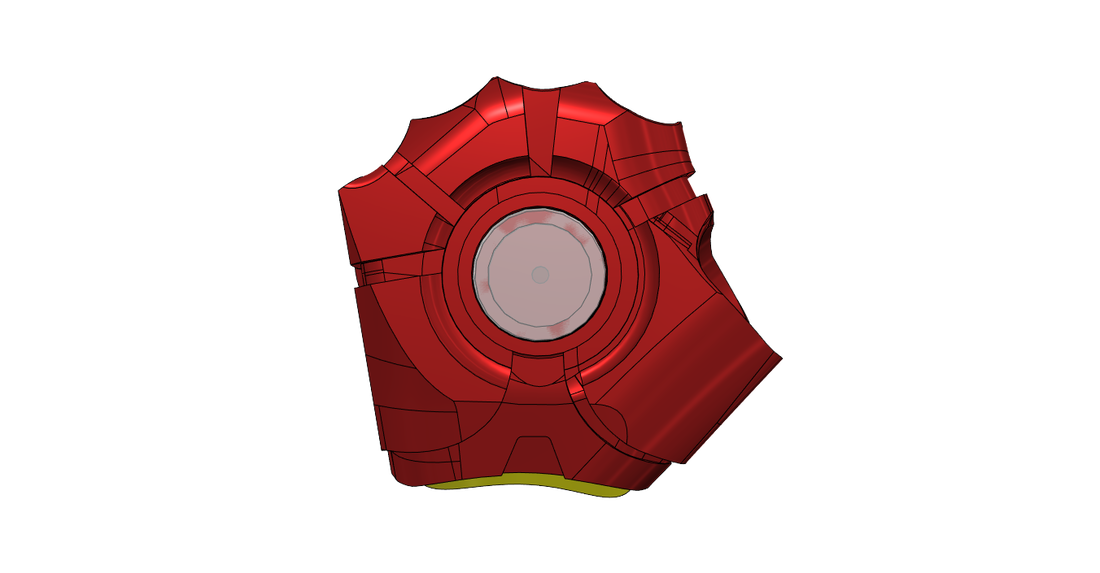
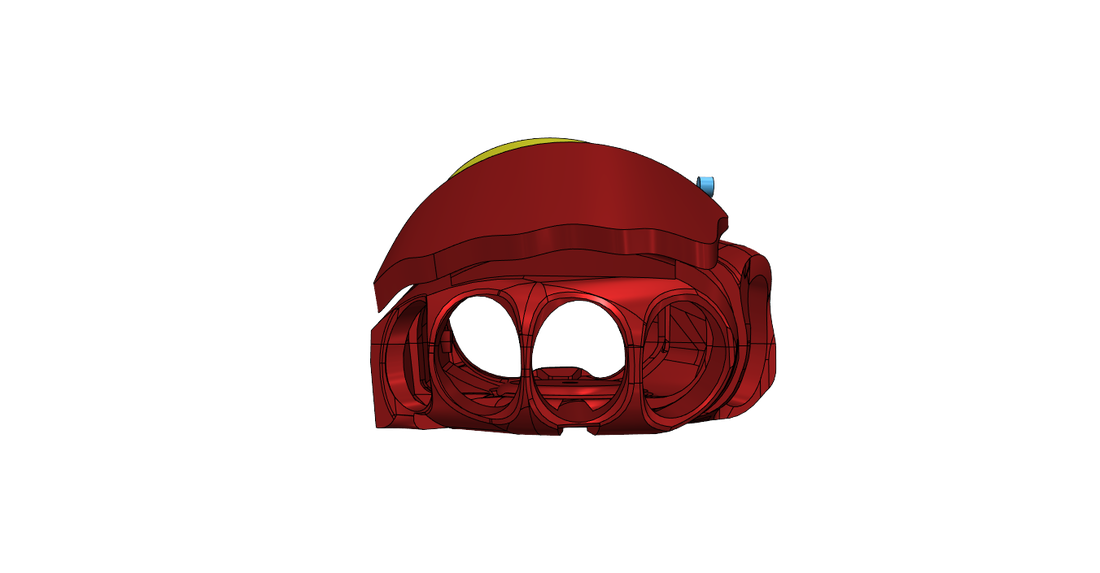
Hello everyone. It's been 2 months since my last post as I decided to skip August's post. The reason for this was because I felt there wasn't enough for me to talk about. Within the month all I had got done was some re-designs and by the end of the month, I realized some of those designs were going to be scrapped anyway! So here's this month's update that I'm please to show you how much my project has moved along. The helmet - I've started working on a new part!So the first new part of the suit I have worked on since starting this site is the helmet. My decision for working on this next was actually after I started working on the full upper body. As I had completed my arms (more on that later) I thought about applying those to the mannequin and to then work on the upper body. I originally planned to make the helmet last but the thing is, as I was designing how the upper body was going to work, I realised something. I have no idea how big the helmet is going to be when folded up so how am I meant to plan where it will slot into the back design. It hit me, I needed to completely design the helmet, the arms and the size of the hands before I could move onto any other part of the suit. Reason for this is I need to incorporate the helmet into the back when it folds up. This helmet was no easy task to design and it took me over 50 hours to complete. First, I created some basic squashed circular shaped and then cut apart the different levels for the stacking effect at the back. After adding in the ear bases I started carving the bottom of the jaw out of a new solid. From this point onwards I closely worked with sketches to cut up solids into the right kind of shapes. After creating the angled front and the tricky curved sides of the jaws I moved onto the faceplate. By this point I recon I would have spent about 15 hours working on the helmet so far. The face plate is mainly composed of a small part from the circular solid of the main helmet part and two more squashed circular solids. I worked these together with major work done by the fillet tool. Getting the right angles and seamless circular look of the faceplate was very tricky and took at least another 20 hours alone. Next I focused on adding the little details including indents and the ears before hollowing out the whole helmet. It was definitely a good idea to keep this step for last as it was so complex. This step took 10 hours of my life away just because of how many faces I dealt with whilst using the shell tool. After finalizing details I cut up the helmet into printable pieces. So many times have I been annoyed of my bed size being about 20x20x20cm instead of 30x30x30cm. If I did have that larger bed size I would be able to print, I think, all of my parts without splitting them up. Not much I can do about that. The only reason I got the whole helmet done within a month was that it was so damn fun to create and figure out. The first mechanism idea for the helmet was to have is fold up into a 'C' shape and slot into two holes in the back that would open up, but by the time I realesed how much I could really shrink the helmet design down to (which is still a 'C' shape just much taller than planned) I had to replan. In all honesty I don't know exactly how it will work still because I haven't returned to designing the upper body again yet. I could have it fold under that back, attack to one of the sides or maybe just stay at the back of the head. Who knows. The fact is, I have to do the helmet first. So going by the film the helmet basically curls out from the back... then magically the faceplate comes from nowhere. I'm pretty sure the lines in the faceplate and how it fitted together in the shot was just to make it look like it had unfolded from somewhere, hiding the fact it just appeared randomly from behind the head. What I have instead done with the faceplate (not final design but would be cool if it worked) was to divide it into three parts. The side two parts will hinge on the top and the middle part will spin around in the middle. This will shrink its size enough to fit behind the closed helmet as well as look awesome when unfolding. Also, in the movie the helmet is automated, but in reality I just can't do that with just how thin it really is. The plan is for me to pick up the helmet from my back, slide it onto the back of my head, then to grab hold of the ear pieces and turn them. I will have the front of the helmet directly attached to the ear pieces and for all the other parts behind to then be pulled out in series. It's kinda hard to explain so here is an image showing the stages of it unfolding: At this point I have completely finished the design and all I need to add are the mechanisms. I thought, before I do that, I should really test if it fits my head properly. That is why I have broken it down into 15 pieces to 3D print. I will then be assembling the helmet together as one solid part using dissolved ABS in Acetone as a solvent to glue the pieces. Currently, the helmet is being printed piece by piece, day by day, but because of how many pieces there are it will take quite some time until I can move on. Redesigning the suit - The armsSo, it was clear before I had to shrink the arms but really I just couldn't keep shrinking the same design I had. I made the decision to restart the arm file from scratch after I had broke down the lower arm into printable pieces and started printing. Quite quickly I realised just how thick it really is. Here's what it looked like:
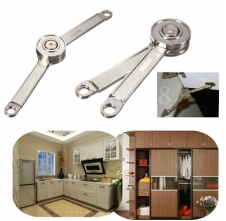
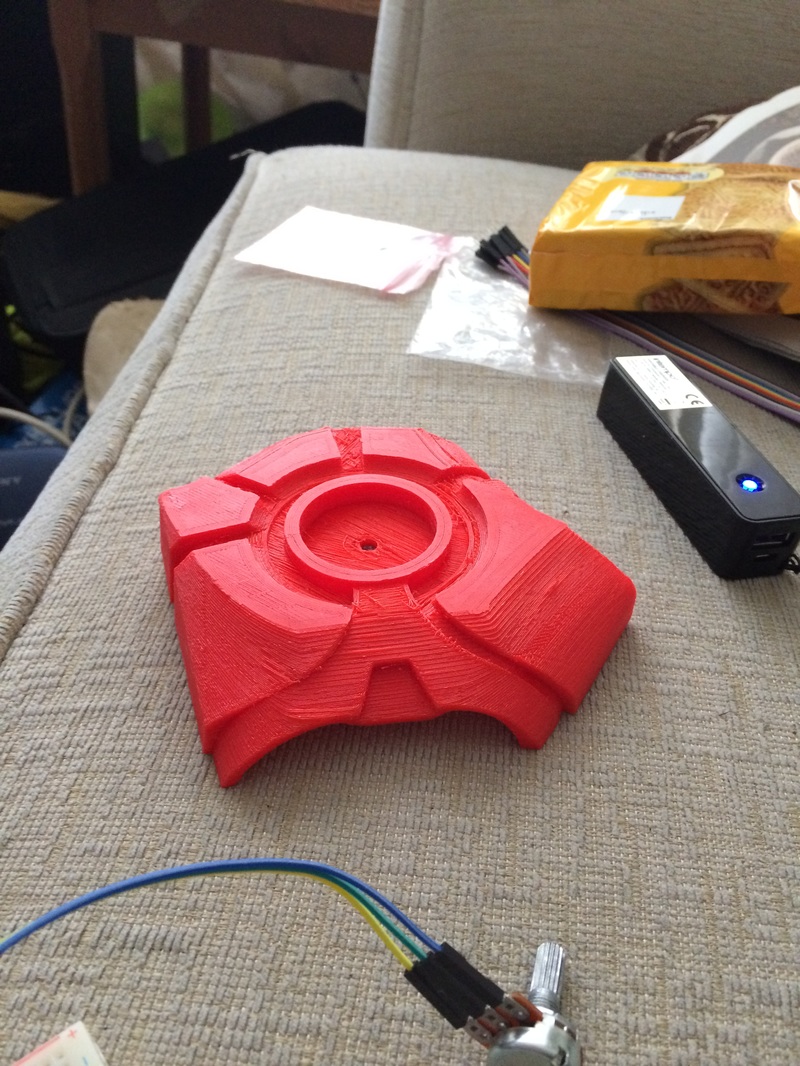
The great thing was that now my arm is super simple and I know exactly how I want it to look as well as how I am going to get it to look that way. Only thing is, I haven't actually gotten very far with that. All I have right now is the following: a basic shell but with the bottom part widened to match up with the upper arm. What's nice about restarting this now is that I'll be able to fully straighten my arm. I have made the armour 1.3cm thick for both the bottom and the top parts of the arm which seems to be much better, but this means the 1.5cm thick elbow joints won't fit inside the design anymore. I have had them bought for quite some time now but they may still come in handy in the leg knee joints. By next month I hope to have the arms almost if not fully complete and print ready (at least for size testing without mechanics). This extra testing step is something I definitely need to do for each part of the suit. This may lead to duplicate parts but the test instances I have done so far have only shown how helpful they can be. An instance of this is with my current two palm test prints. Next month, look out for the arm to be mainly focused as the helmet will probably just be finished printing by then without much mechanism progress made. The 3D printer - Figuring out its limitsSo as described in the first post the current setup includes a Raspberry Pi B+ to control the 3D printer. This eliminates the need of hogging the laptop as I can't unplug it during print due to the broken 5V regulator of the Arduino Mega board within the printer. The pain of doing this way though was that whenever just clicking one button in the software for the printer to do something (like to head the bed) then it would take about 25 minutes to compute that. During this time the RAM would be in full use and nothing could be done in the meanwhile. By the time I could hit print it would have been over an hour. One great time saver I figured out was being able to control the printer via just knob and the LCD. This definitely sped up the setup time but I ran into an issue when printing the lower arm test print. The file for the lower arm was so large and complex that the RaspBerry Pi couldn't handle the load and every 10 minutes or so the printer would stop operating for about 30 seconds then it would carry on. Unfortunately, this caused weak layers to be produced within the print and cracks appeared that would just not do. I believe that happened because of the Raspberry Pi using up too much power and not being able to keep a stable power outage to the printer; The 3D printer is powered partially through the Raspberry Pi. Instead, I tried using my micro SD card in a SD card adapter but that didn't seem to be read. I still need to test if a normal SD card would work, but if not then I'll have to return to the laptop being hogged every time I print. Not ideal. In terms of the wires being untidy and all over the table... that's still the case. I should really get around to neatening up the cables and screwing the LCD onto the printer. Alternate designs - The fingersSo far the fingers are designed by me and seem fine, but about half a year ago these other Iron Man finger designs suddenly appeared. For some time I could only find design files of these fingers as purchasable files on a few sites. Finally the files are now available on the Autodesk 123D Design public library. When I found them I instantly downloaded them and checked them out. What's better about them is how there are fillers on the top of the fingers so when bent, you can't see through the gaps. Also, the design flows a lot better than mine, plus there is a larger thumb version (this being good because I currently haven't designed a thumb). still, I need to print them and test them out. Here's what they look like: Redesigning the suit - The new palm design improvementsSo I haven't really done a lot with the palm, being so busy with the helmet, but I'd like to mention what has been done. I have cut off the side of the palm where the thumb fits in. This cut is at two different angles (20 degrees apart) and also diagonally cut inwards. This is to enlarge the area of contact and also to lock the piece in one position. What I'm doing is creating a valley with the top and bottom angles crossing over each other. This should prevent the piece from moving forward and back and secure the whole thing together when it is on.
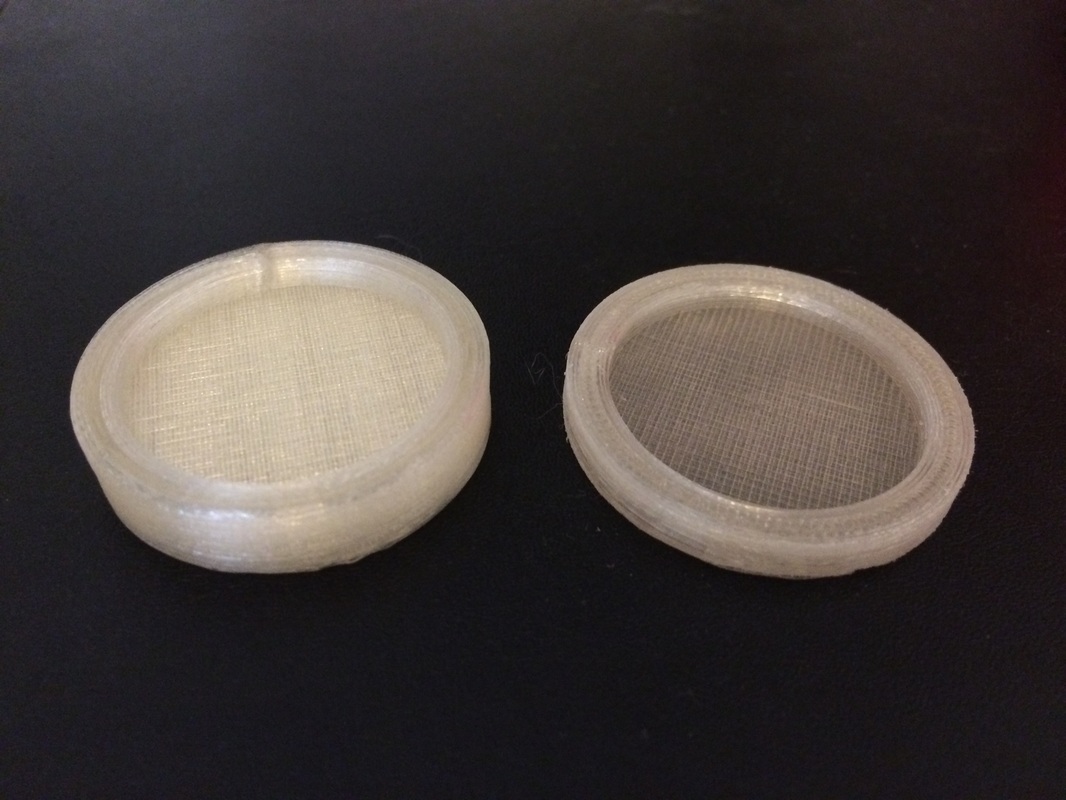
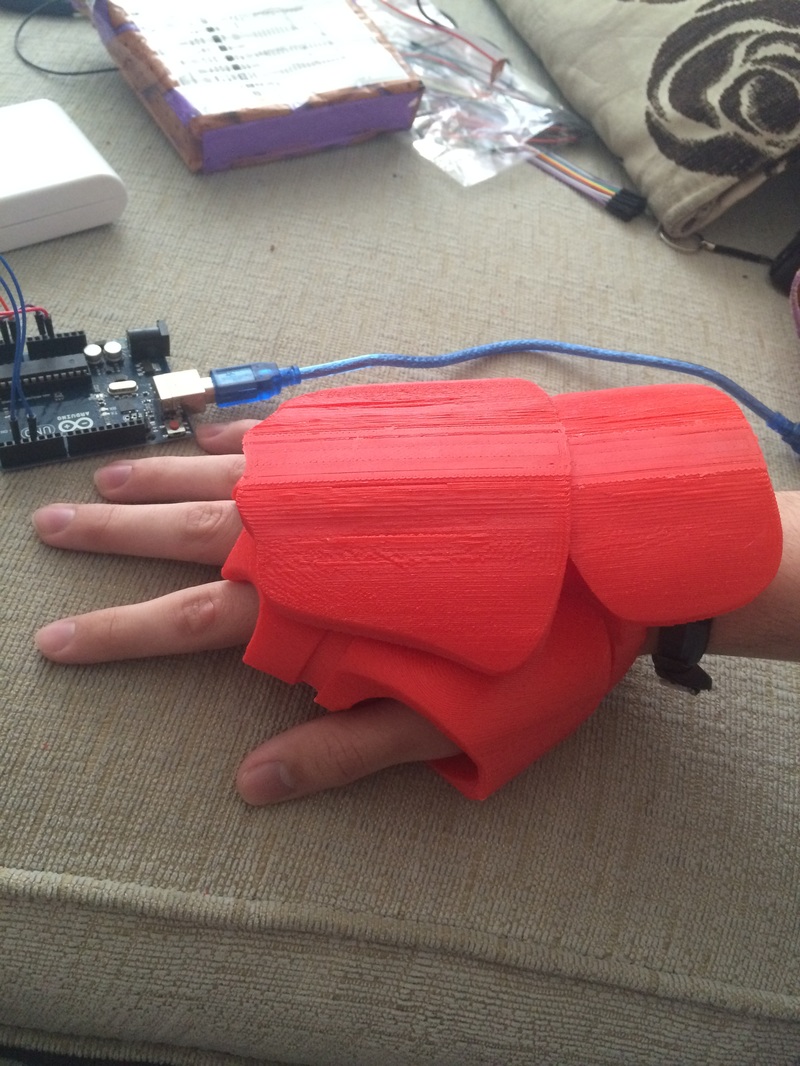
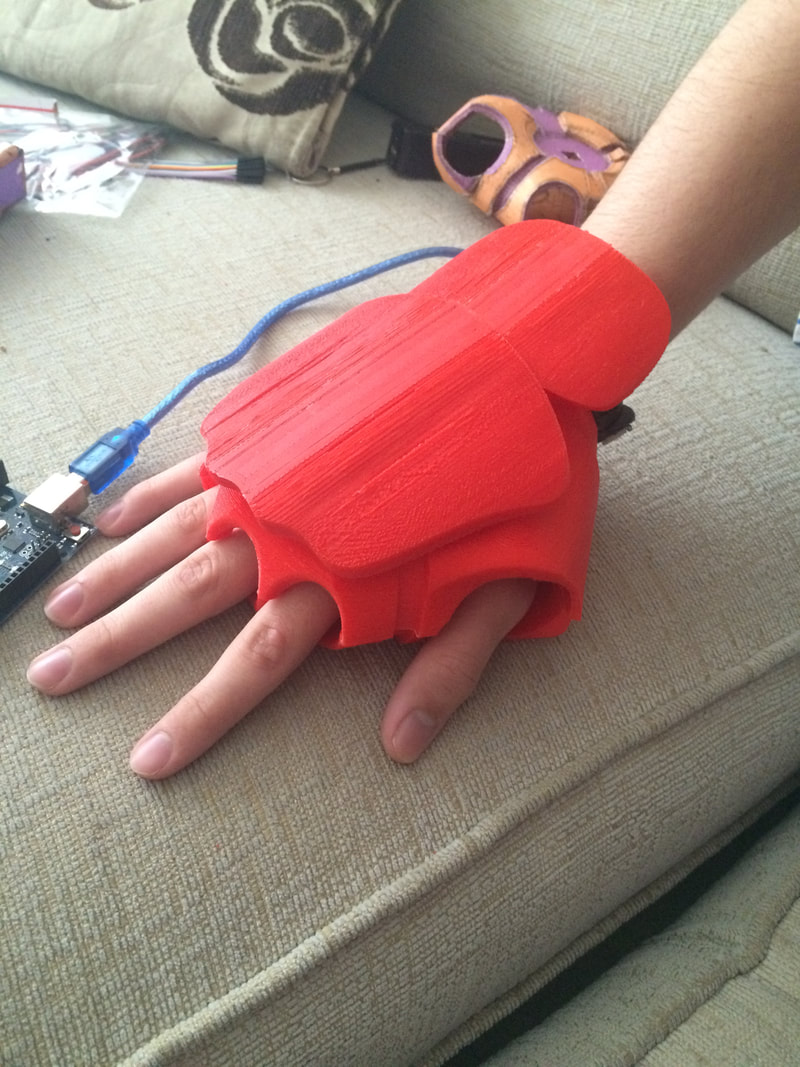
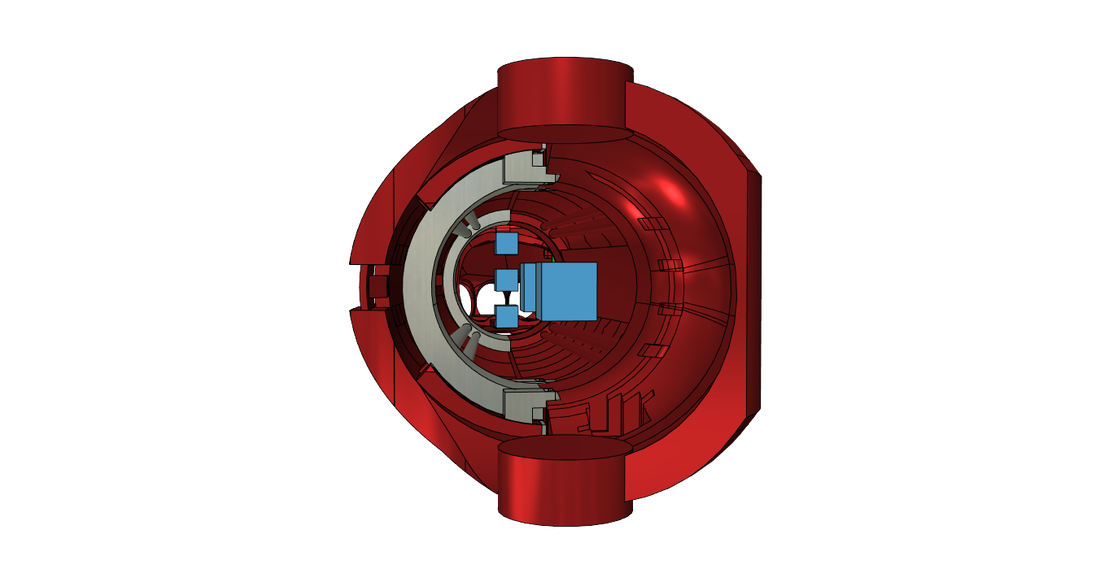
Another minor update I have made to the palms is how I have created models of the electronics I'll be using (the Lipo battery connected to a Adafruit Trinket Pro via the Adafruit Lipo backpack. These elements were positioned in the underside of the top cover in a way so that they will not go through the top and sit in line with the inside edge (to prevent poking into my hands). One electronic I haven't yet added a position inside the palms is for something new and remember that I haven't mentioned anything about the potentiometer yet. 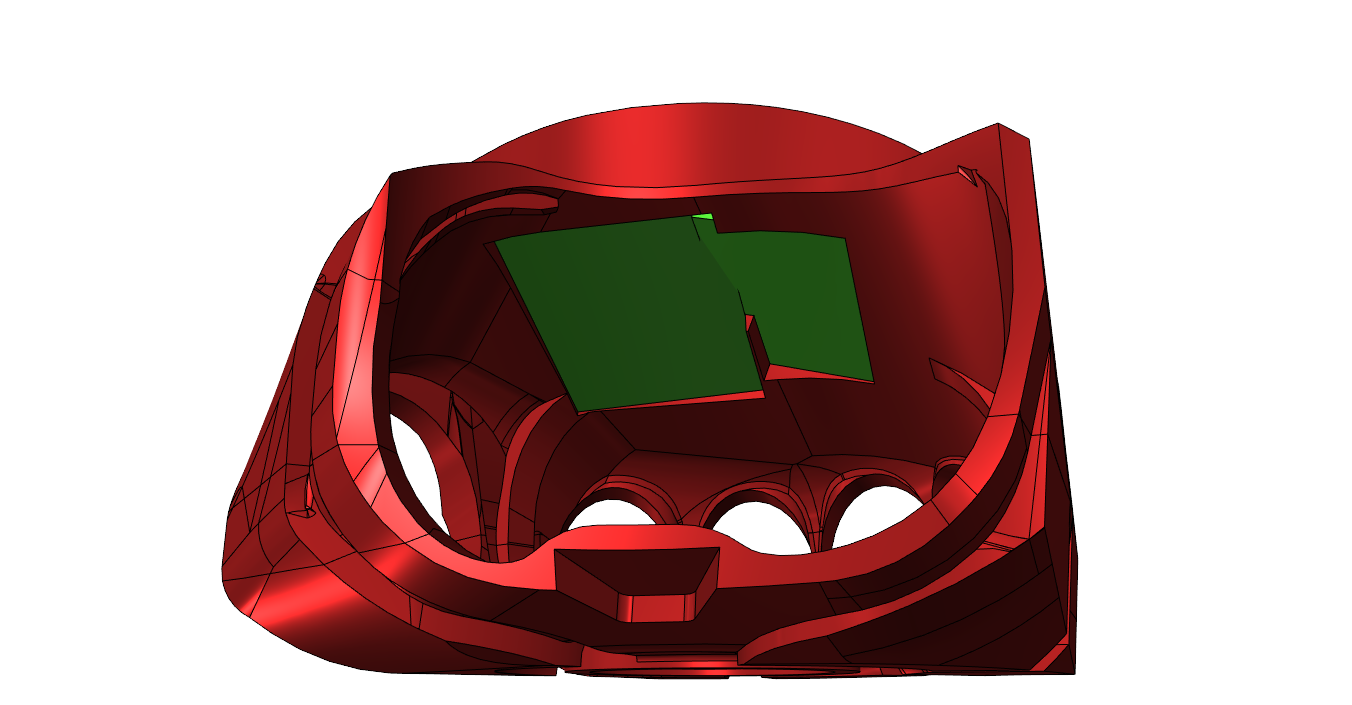 Designing mechanisms - The palm angle detection systemI have always not wanted a simple button press method for the palm repulsors as I wanted a gradual reading of my wrist angle. Sadly, I cannot fit a potentiometer into the hand without external casing, not to mention another system that connects to my arm. Last time I talked about having a piece that went on the underside of my arm. The idea was simple but I didn't take into account my hand bending forward. The whole system holding the potentiometer would have been very gimble like and to have that would be way too large, along with the potentiometer, it was impossible for a low-profile design. 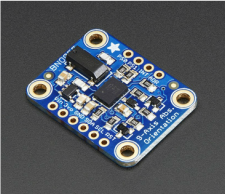 I watch James Bruton on youtube and I highly recommend looking him up. His projects are really inspiring for me and lately in his Ultron project (a stand alone robot with it's own AI) he used Inertial Measurement Units (IMUs) to measure the angle of his body parts. Next I thought, why not use them in my palm. They can be quite small so fitting them in shouldn't be too bad. I have 2 decisions. To either have one in the palm or to have one in the palm and another in the lower arm. With just one in the palm means the whole system will be just in the palm and no wires need to be extended anywhere but it mean that only when the palm is vertical to gravity will the firing sequence run. On the other hand, I would be able to measure the angle of my wrist by reading both IMUs at once and finding the different. This would mean I need to link the lower arm and the hand again which I would rather not do. One way I could do the second option is by having a sturdy cable casing. That would extend from the base of the palm and will hold the wires that lead to the other IMU which would also be inside the casing, on the end. That would probably be possible but I don't know how much space I'll have in my lower arm now with it's thickness only 1.4cm. I'll just have to complete my arms and first before working any more on the palms. Furthermore, because I haven't decided how the system works I haven't updated the code at all yet. The summaryThat wraps up this month's update post. Within the next month I will hopefully have a whole helmet to show off to people when they ask about the project, oh and also to test if it even fits right. While that is printed I'll be working on the arms and try to get them at the printing stage for next month. I'll play around with how the palms may work and see how the new fingers are as well. Also, did I mention I now have red gloves for the hands all put together including palms and fingers. Till next time.
-Cirtoyt Last month I had a very positive response from friends and page viewers and I thank you a whole bunch for your support. It has really given me the drive to push forward in this project and I am glad to inform you each and every month of the great progress I have made. This month I haven't been working on any new parts of the suit, but I have reworked the design of the current parts I have made and planned how the whole suit will work in terms of transforming. Redesigning the suit - Identifying the problems
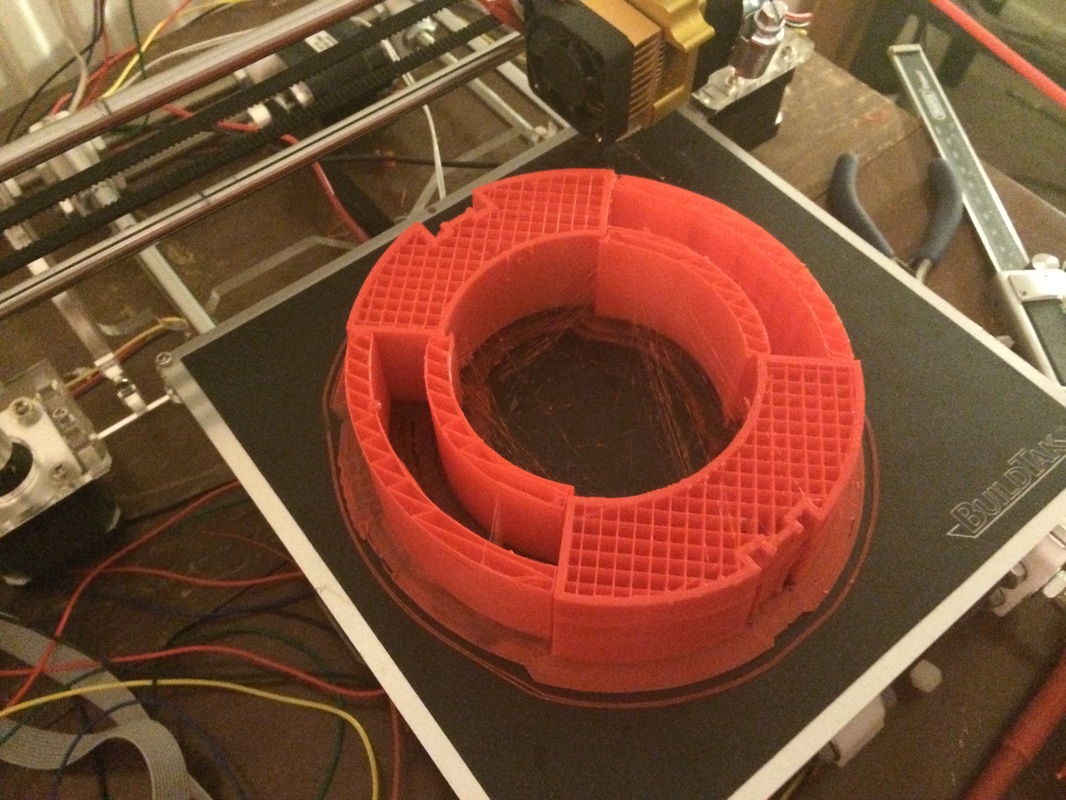
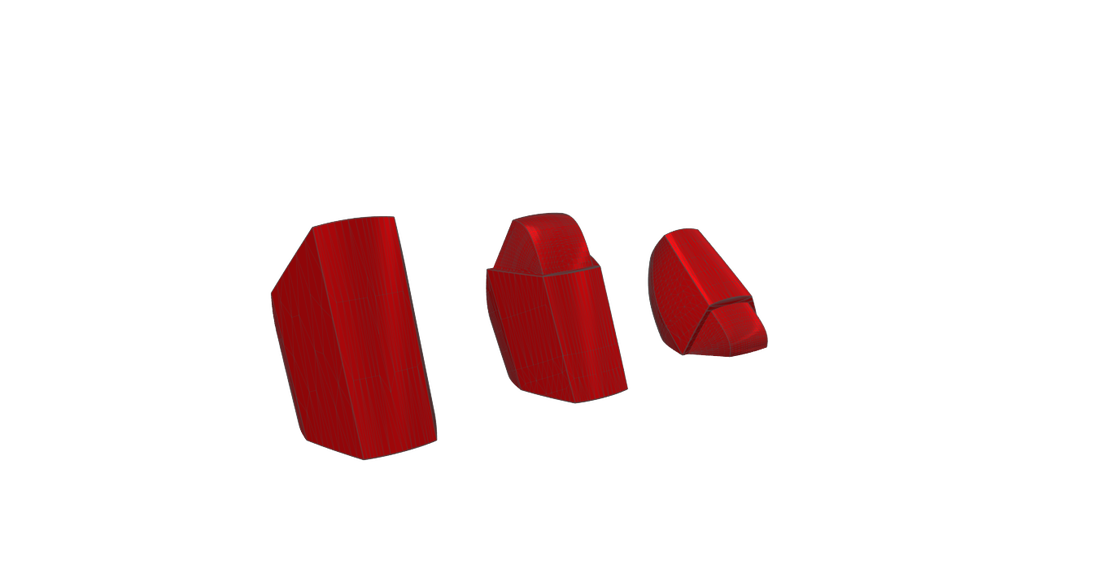
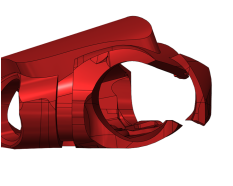
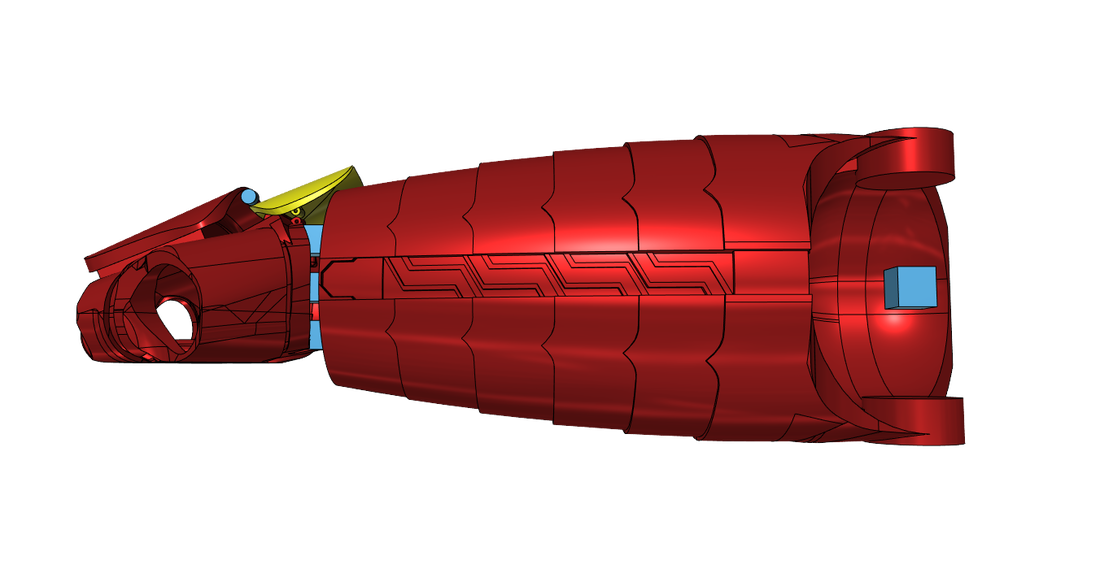
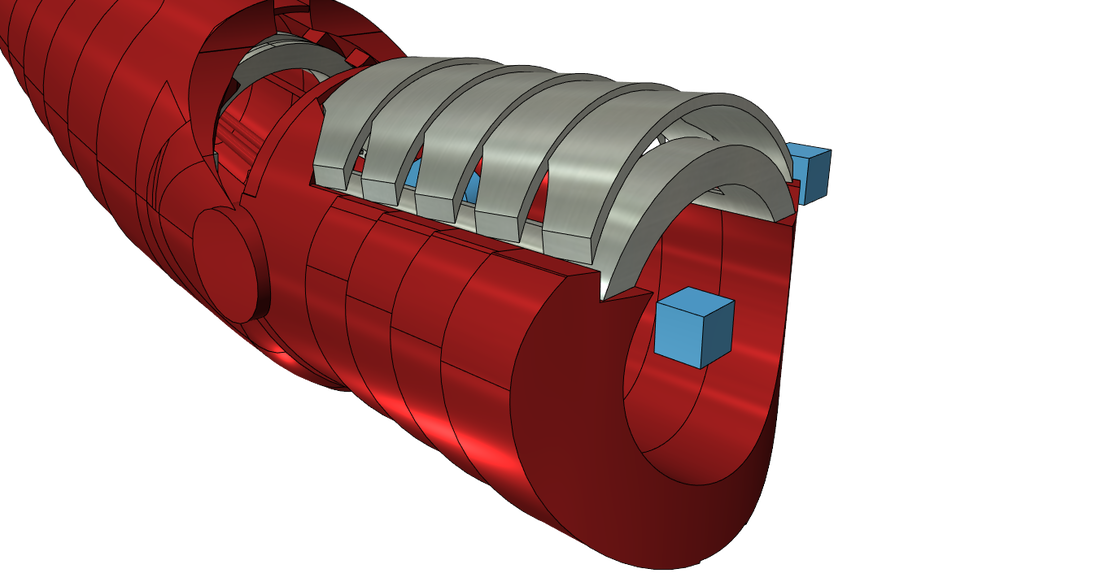
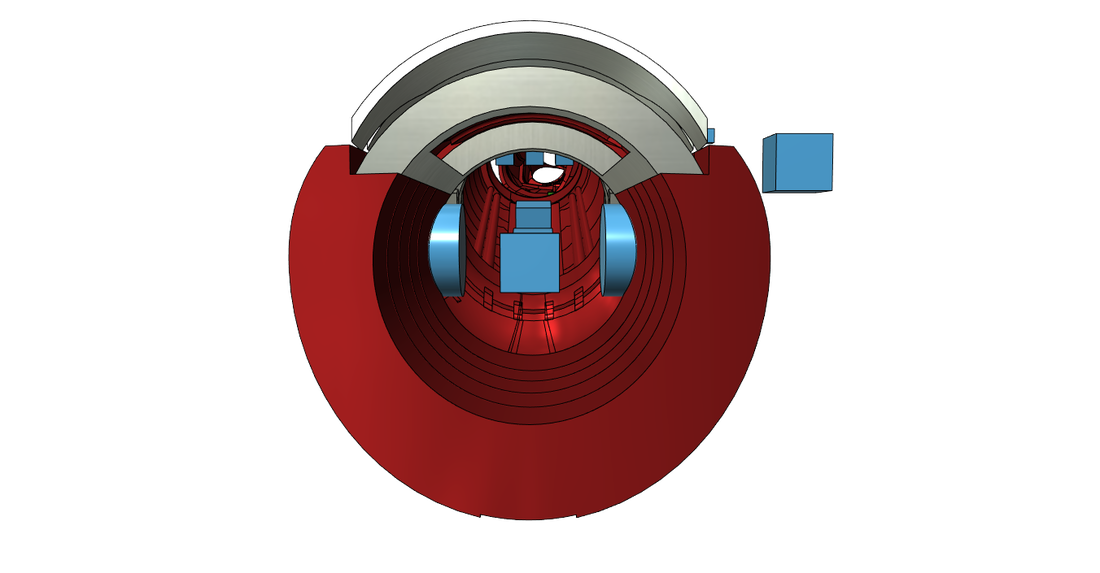
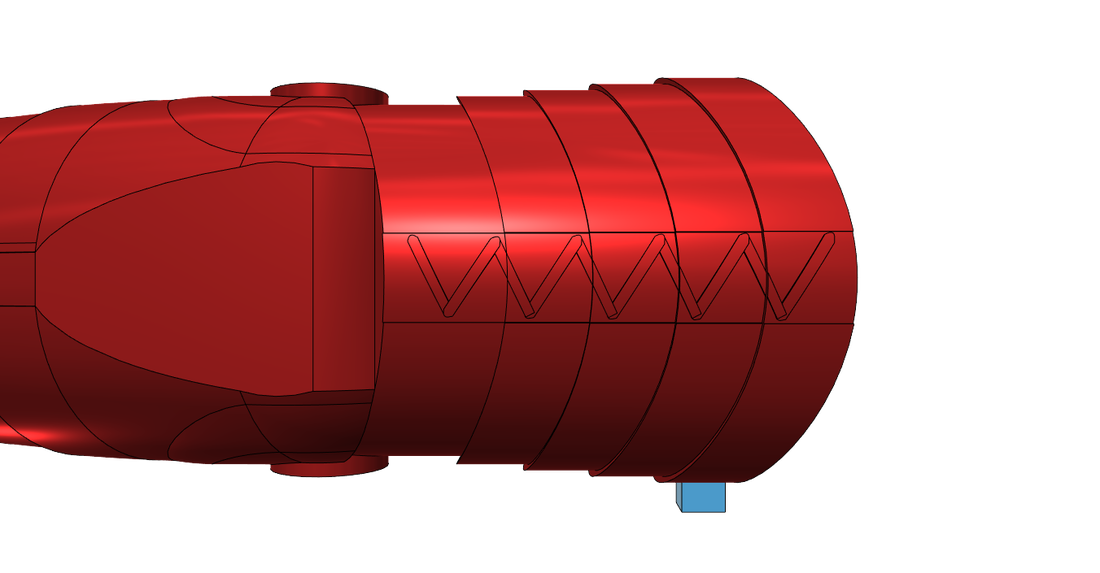
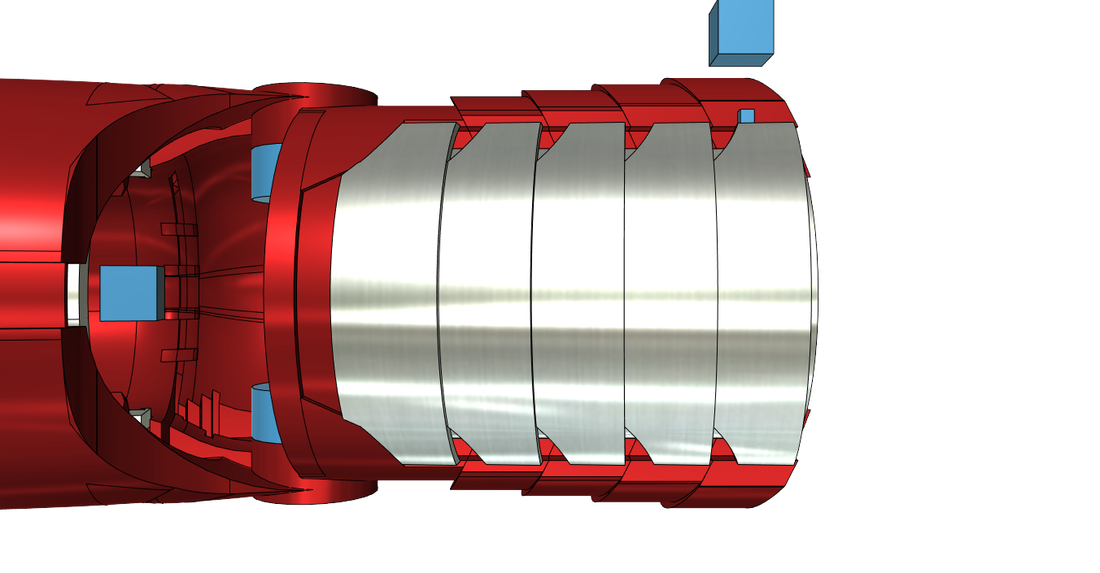
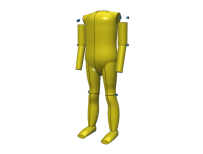
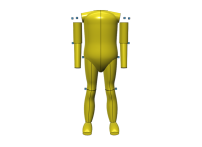
The first problem that was identified last month was that I had made my arms way too thick and that I was worried about not being able to fit in the micro servo with the lower arm being any thinner. This is when I decided to really break away from how the suit in the movie worked. What I was doing was taking the design of the arms from the movie, slightly modifying it and then re-creating that. I know that the suit in the movie is CGI but I was sure I could make this work. Thing is, I have only learnt this month how much more simplified I have to make the suit. I still want it to be movie accurate in terms of its outer design (when worn, not in suitcase form cos that's going to be impossible) and not add anything too far out there like adding an arm missile cover just for storage of electronics. So now I was working on simplifying the suit mechanisms. Redesigning the suit - Stripping down the suit parts currently designedBefore anything else I got rid of all the railing systems I showcased in last month's update post. That included the opening system for the top of the lower arms and the wrist joint I made. I then got rid of the cut outs I made for the micro servo and the string idea before starting to thin the arms out. I really think I have done a good job on this as the upper arm's thickness is no longer about 4 cm but about 2.5 cm. Here are some pictures of the newly thinned out arm designs:
Following the movie suit, my plans of the arm's mechanisms were to have a skeleton inside the arms with the armour covering it. I simplified the skeleton design so that it was just the front but then I ran into all sort of problems with the seam line of the armour and the angle joint. For the upper arm, again following the movie, I planned to have the armour to slide down from the top on a railing system based on the inner skeleton as well as having the top panels rotate vertical. All this was scrapped and I made each the lower and upper arms into solid parts without any skeletons. I still have the top part of the skeleton on my lower arm design right now just because I haven't got round to filling that in yet (it takes a few hours). Redesigning the suit - The new arm mechanisms
Using this new mechanism I have avoided the use of rails and only used two different type of hinges. I also get to keep a lot of the original design on the suit this way. I mean did you see the bottom of the lower arm last month?! It was horrible because I had to layer the pieces for each part to slide into each other. Now I am able to copy the parts on the lower arm, flip them and have a seamless design that I thinks looks waaay better.
Redesigning the suit - The new palm mechanics
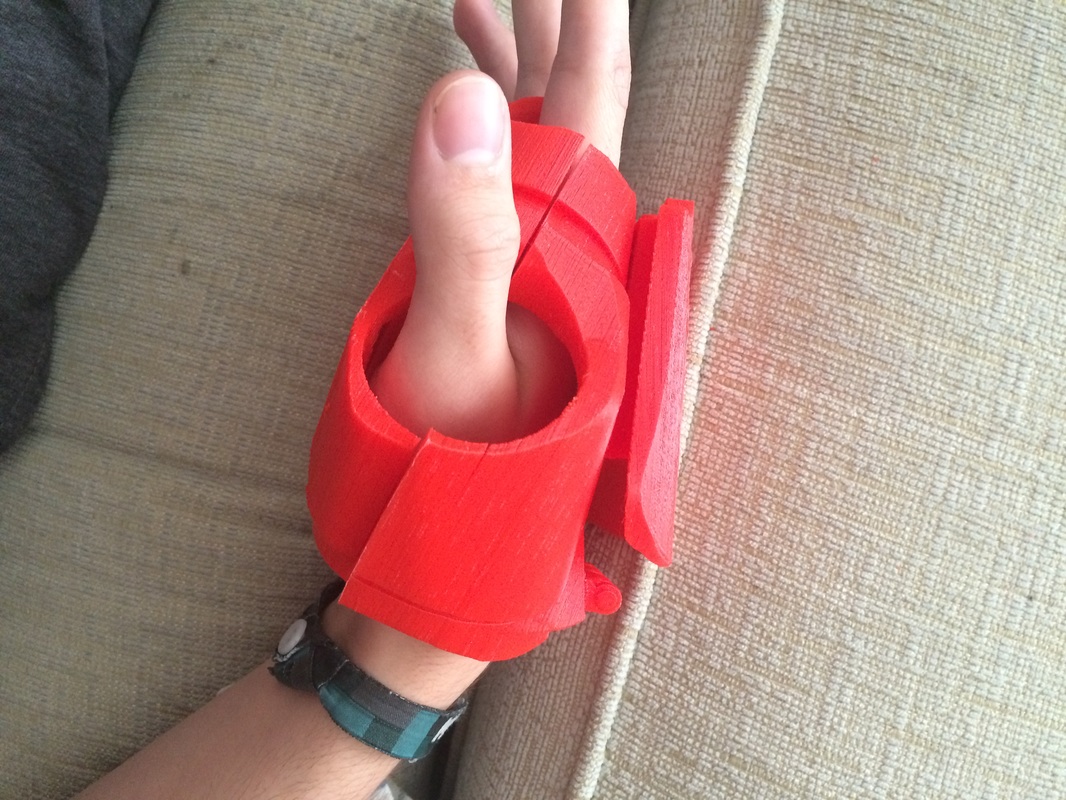
Anyways, the pivot design was good but didn't work on such a small scale with the support material really clogging up the dents. This lego based idea works great in lego, but with 3D printing I figured it isn't really a very viable solution. Also I don't have the potentiometer based in the same place so the awkward slot for it has now been removed. Of course with this new design I can't have the wires for the repulsor and potentiometer go up the inner skeletons and join onto the chest piece so now I'm working those whole systems independently into each palm. The idea is that I make the palm cover plate one with the palm and cut a cutout area for the electronics to go. I can then lead the wires down the sides of the palm and around to the front. Again, with this idea I need to change some things for it to work, that being not having the palms split into two parts anymore. The original reason for this was so I could put my hand into the palm as the wrist was too small for my hand to slide into. What I have realised is that instead I can just have the thumb part come off. I have thought of a few different ways this can work like just having it come straight off and to 'snap' on via magnets just like how the the upper and lower palms were meant to work. I could have the piece slide into place with bits that go on the inside of the palm and clip on or, what I think I'll be trying out, is to have it hinge on the top of the palm with a spring in the middle of the hinge to keep it closed once my hand is inside.
Redesigning the suit - The new palm electronics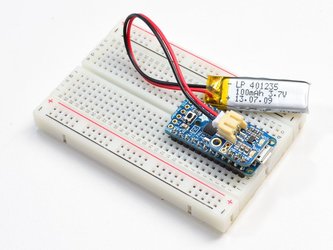 What I have bought is a Adafruit Trinket Pro 5V version with a Adafruit Lipo Backpack to be able to power the system with a 2000mAh Lipo (Lithium Polymer rechargeable battery). The Adafruit Backpack has two spots to connect a switch which I may add; If not I'll just disconnect the battery from the backpack when the suit isn't in use. I will then have three wires run from the Trinket Pro to the repulsor at the front of the palm, one for power, one for ground and one for data and similarly for the potentiometer which will be placed also at the front of the palm, at the bottom, on top of the wrist. I plan to design and print a slim curved plate that will go against the bottom of the palm and into the inside of the lower arm part of the suit. The top will be glue onto the potentiometer somehow. The plate will be loose except for the potentiometer joint so it should be able to move around freely as I turn my wrist and not take up too much room nor locking my wrist to certain restraints. Again, I have not done this yet but plan too. For the coding I didn't really have to change much, I just had to make everything I had double, for each repulsor, single and rename some things. Here is the code as it is now, which will be the same in each palm. Of course I may change this if the angles aren't quite right or if I want to add some different colours to the mix or a new lighting sequence (like the whole repulsor flashing when it reaches the maximum firing angle or when first turned on). 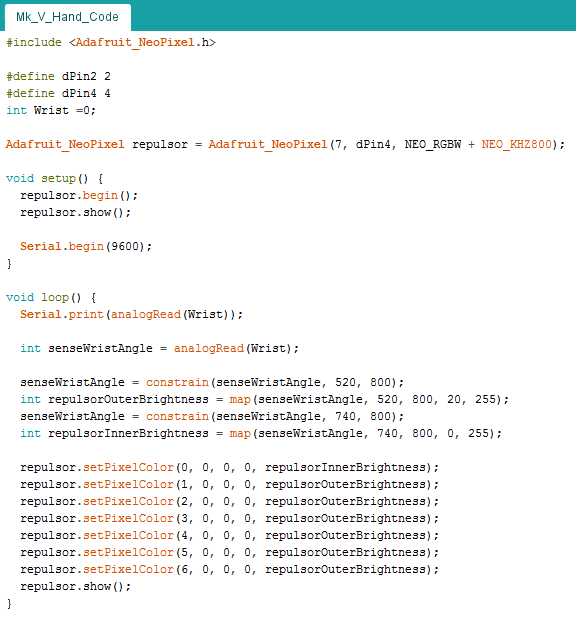 The SummarySo that's about it for this month's work. By next month I plan to have the hand design finished and hopefully at least partially assembled. I also plan to have the arms printed and complete by next month's update and for me to start designing the chest and shoulders based off the mannequin. Thanks for reading and I'll let you know how I have done at the end of next month!
-Cirtoyt
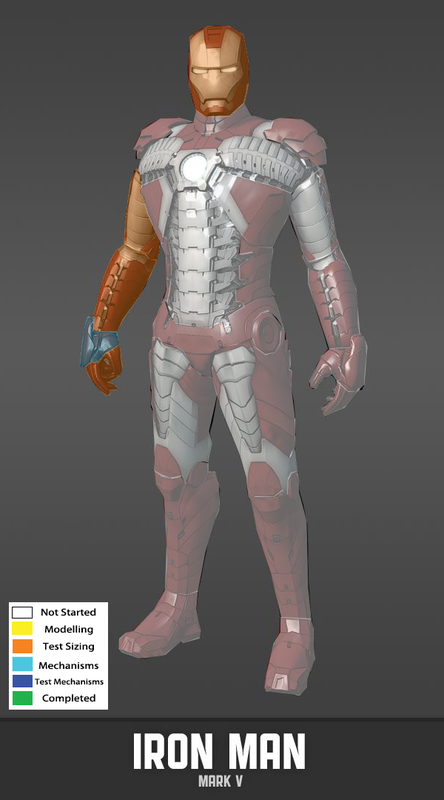
I have so far been working on this project for 4 months now (since early February 2016) and have finally decided to create a site to keep track of my progress. Check back here each month for new updates on how I'm going. My goal is to create a fully functioning Iron Man Mark 5 suit (from Iron Man 2, the briefcase suit). By fully functioning I mean that it will unpack from its briefcase form by suiting-up onto me, plus the repulsors can fire (with lights and possibly sound effects). The suit will also include a light up chest piece and eyes and I will be able to walk around in it like any other cosplay when suited up. Here is a video of the movie suit transformation that I am trying to replicate:
What have I done so far?
Right now I am working on finishing up the mechanisms for the upper arms. For each arm/leg I only work on the right variant and then mirror the design over for the other side when I have completed each part so all designs you will see shall be for the right side. At this point I have designed the fingers (excluding the thumb), the palms, wrist cover/joint, lower arm and mostly the upper arm. Below I'll be going into more detail about the approach I am using to create the suit then I shall lead on into how each piece I have designed so far looks and the mechanisms I have planed for each piece at this stage. I will not cover any mechanisms of pieces I have not yet designed as I only have a basic plan until I actually get to designing the piece itself.
How the suit will be made - The 3D printer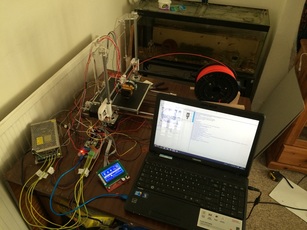
In February I bought myself a DIY RepRap 3D printer set off eBay for £250. Great price right? Well really I only just got it all setup perfectly a few weekends ago! After a mistake made in the handbook some boards got fried and we needed replacements, we got replacements then the hotend holder melted with a non-working fan. Next, the replacement boards broke again for no reason whatsoever. They just died. So after 3 months of breaking and replacing, breaking and replacing again, we finally got it working.
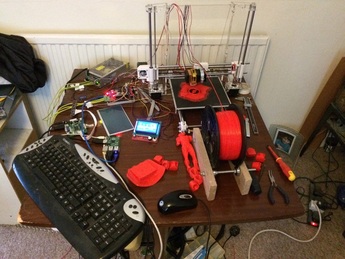
Thing is, the system wasn't perfect. What was wrong was that we had to have our laptop connected at all times to power the printer; That being the only computer at my dad's house was a problem. My solution was to set up a Raspberry Pi B+ I had laying around as what we would use to power the printer and to control it. Thankfully it only took me a couple of weekends to set that up, making our solution much simpler. Just save the design file as an stl file, slice that with preset settings in Slic3r, then put that on a USB drive. Plug that USB drive into the Raspberry Pi, turn everything on and press start. The nice thing about this is that I can design files, slice them up and email them to my dad at his house. He can then just put that on USB, turn on the printer setup and press start in the mornings before he goes to work. At the end of the day when he gets home, there is the finished piece all done.
How the suit will be made - Materials
My plan is to pretty much fully 3D print this whole suit. Sounds insane but I think it's the right way to go. I can only really design by working within the software I use to actually see what I'm thinking and by it coming to life I can always see some kind of flaw I didn't think of. This way I can iron out any mistake before it is made and repeated creation of the same thing won't happen (unless I print and it is slightly too big,small for my body). Another reason I'm doing this is because my designed are quite complex when put with the curved faces of the suit and I literally can't think of any other way where I can be so precise with the mechanism designs.
Only problem I do have is that my 3D printer doesn't have a very big bed so print sizes are quite limited. This forces me to divide parts up. This isn't too bad as we can easily acetone weld them back together with acetone + dissolved ABS.
How the suit will be made - Electronics
I'm trying to keep the use of electronics to a minimum as having the suit wired all over require parts to stay linked by how they are worn. For example, I won't be able to break apart the abs/hips from the legs if there are wires going down to the bottom of the legs leading to servos that hold the suit together. I am highly depending on the use of in-built mechanisms and magnets to save the use of electronics This allows the suit to break apart for optimal packing as I want the briefcase to be as small as the possible compared to the movie/real-life suitcases.
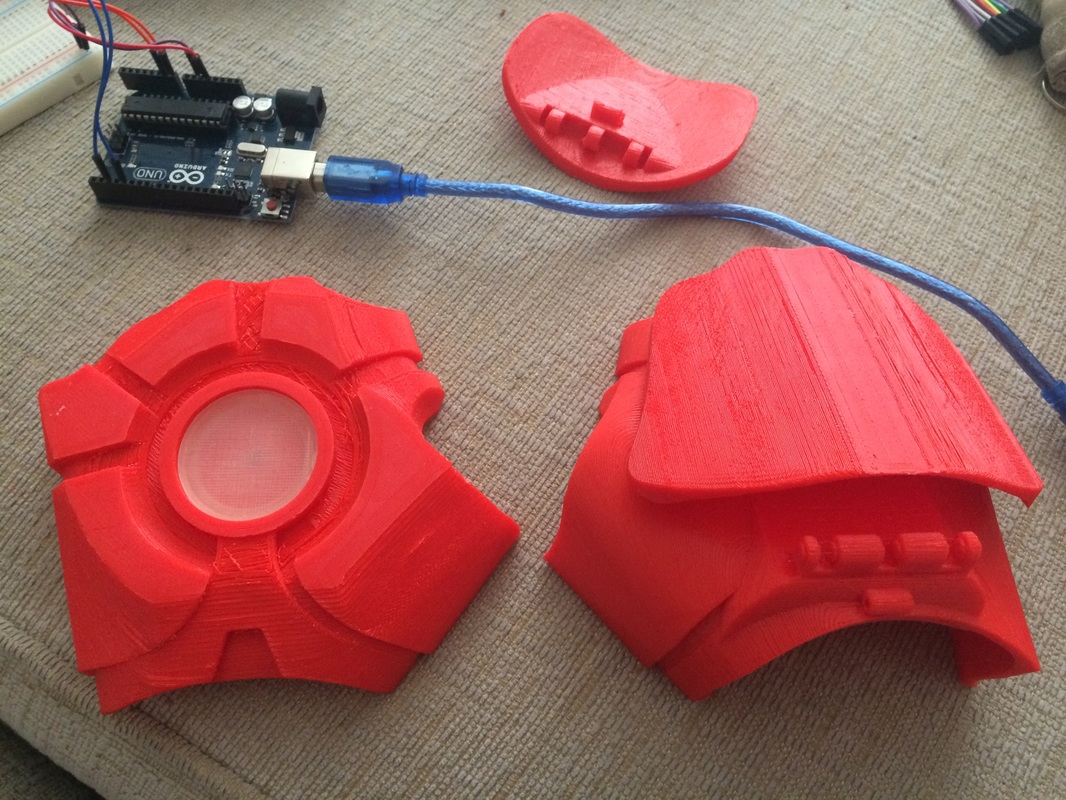
The system of electronics I am using revolves around a battery bank, an Arduino Uno, a couple of potentiometers, 2 Neopixel jewels, a couple Neopixel rings and some micro servos. So far I have only used two micro servos and I am trying to keep the use of them at a minimum as discussed. Right now I have the two jewels and the two potentiometers hooked up to the Arduino Uno with a little breadboard.
I spend about 2 full days when college wasn't on learning how electricity worked, how arduino programming worked, power distribution and learning how to implement the Neopixel library into the system. I did this all through reading the Neopixel Uber Guide on Adafruit.com and watching YouTube tutorials by Jeremy Blum. You can find his Arduino tutorials here: https://www.youtube.com/watch?v=fCxzA9_kg6s&list=PLA567CE235D39FA84 I also watched some other electronic basics videos by him to better my understanding.
So code wise here is what it looks like right now, very basic but I will add the queues for the servos later on when the suit is complete as then I'll know about timing and how fast I can get into the suit (I expect it will be almost as fast as the movie scene). I will show you the code each time I update it if you're interested so stayed tuned for more updates.

Designing the suit - The fingers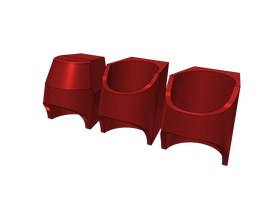
Now these were tricky. I had to find the balance between fitting my fingers, not being too loose and being loose enough that I can still fit them on with a glove on. I solely used circle sketches to create these shapes with line sketches to chop each finger piece up. In the beginning I made them using squares and slicing them up weirdly. This ended up with ring looking pieces which broke really easily. I printed them from the top down which made the thin under finger joints really weak. From experience I now know to print them vertically. The way each layer of the lower finger ring is part of the same layer inside the made finger area strengthens the build plus having it build with a much thicker bottom and in a cylinder shape increases it's strength even more. It took me about 4 attempts with the pointer finger until it was perfect and I have only made 2 models of the middle, ring and pinky fingers so far. I haven't tried them out yet but I think I have got the, perfect now.
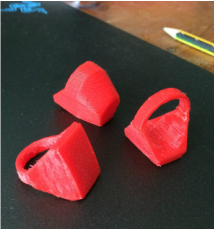
As I said, I need to fit them on while wearing a glove. All I'll do is glue them to the glove to keep them on. I'll do this after I have spray painted both the glove and the fingers in the same colour. I also plan to cut up some tubing to glue onto the insides of the fingers. This should fill out the gaps on the inner fingers and the tubing looks just like the filling in the movie suit. Of course I will paint them the same colour as well and glue the finger pieces over them. I plan to assemble the hands very soon so expect images of that in the next update.
Designing the suit - The chest/palms
This worked pretty well but I had issues being precise with where the cuts started and ended. Finally, I figured out how to cut solids with sketches and this has been how I have mainly reshaped objects since. After playing around with some tools like the mirror, fillet, chamfer, pattern, split face, split solid, push/pull and loft tools I have been learning rapidly how to best design all the models I have made so far.
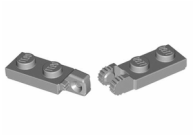
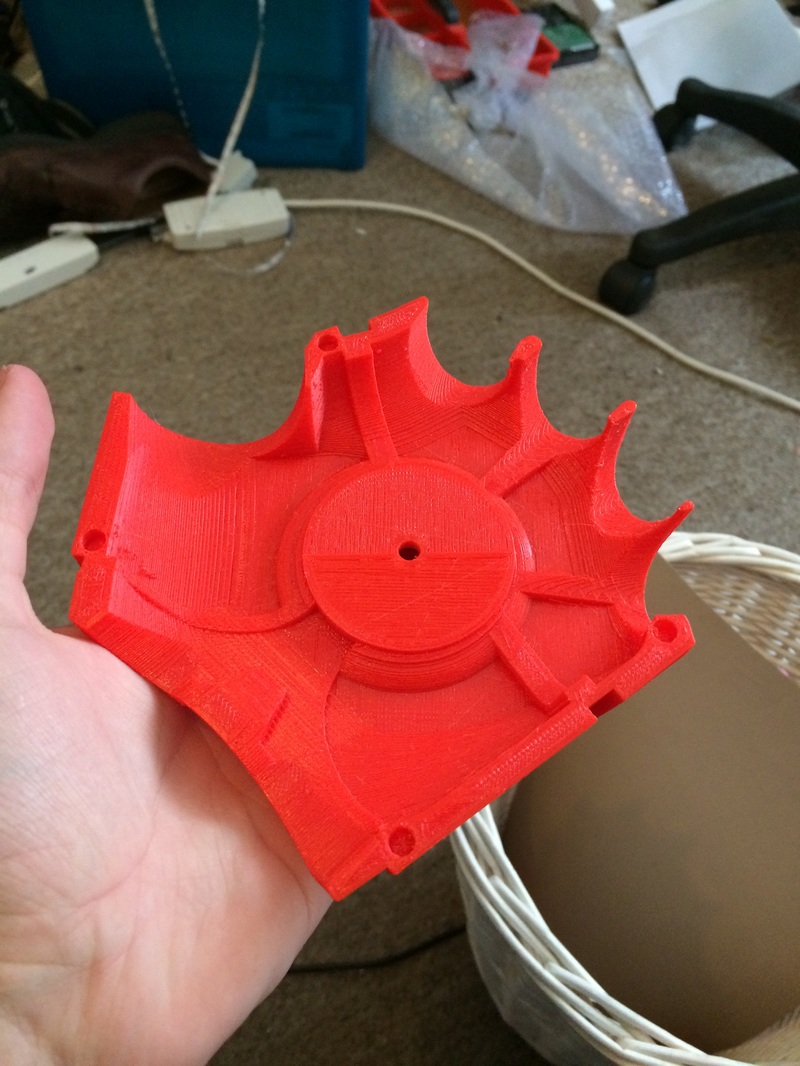
After completing the basic palm it was then time to edit it so it was like the Mark 5 suit palms. I then worked on cutting the shapes for the cover plates with curved sketches and by using the fillet tool. I also had to add blocks on the back of the hand to attach onto the back of the palms. The next challenge was how I was supposed to get the wrist cover to rotate so when I lifted my hand it would tilt up to stay inline with the arms. I thought about just putting a rod inside but I didn't really know how I would hold the rod in place on either side so my dad suggested I used the same idea as those Lego pieces that snap together. So far I have yet been able to test if this connection works but in the next update I will say if it did or not and what I did if it didn't. The idea behind this was so if it was pushed by something and was to snap off, instead it would just pop off the hinge and I would be able to click it in again.
After separating the repulsor piece from the palm for printing separately in a transparent filament I left the palm as is and started working on the lower arm. The one last thing I wanted to do was have a wrist joint that could measure the angle of which my arm was so I could then control the repulsor lights with that measurement. I only added this on when I thought I had completed the lower arm.
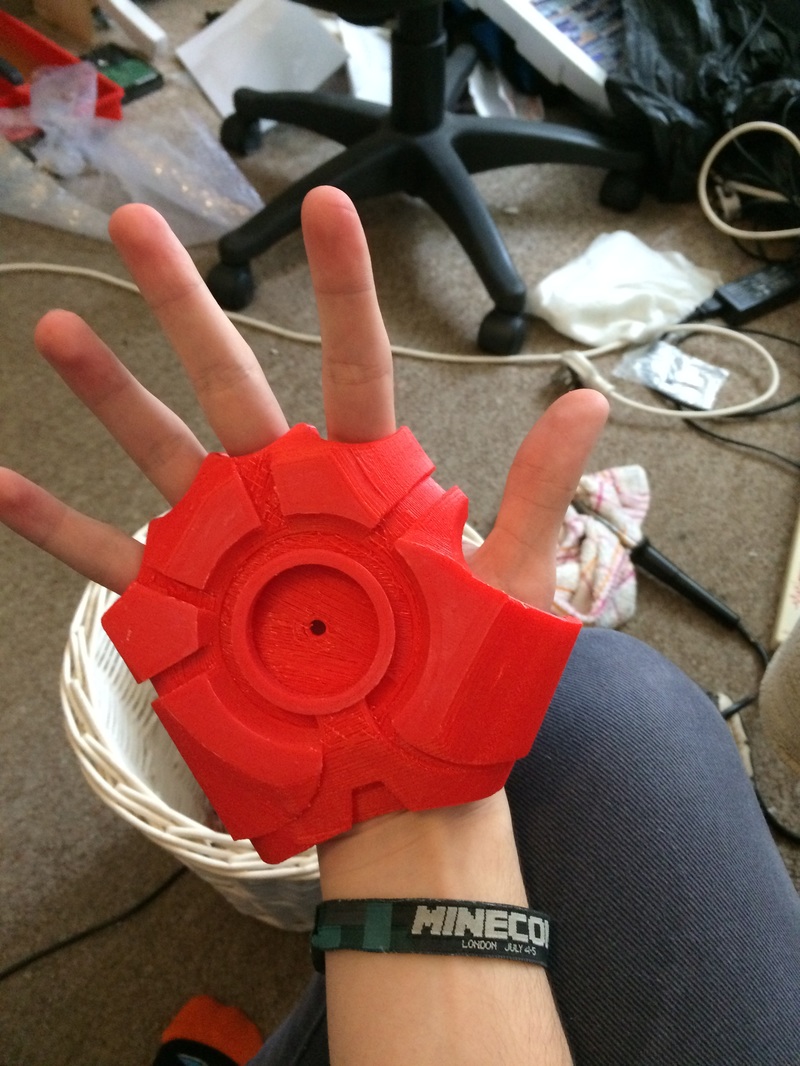
So just 2 weeks ago I 3D printed the palms and they looks great. Sadly, two problems. First, I forgot the print the palm version with the added holder for the potentiometer and secondly, The palm was slightly too big. So next I got the right version of the hand and scaled that down with a scale factor of 0.96. A few days ago I had the upper palm re-printed and I think the scale is just about right. I may need to cut out a bit more of the wrist opening so I can definitely bend my hand completely upright but we will see when I have fully assembled the hand and also the lower arm.
Designing the suit - The lower arm
I'm now at a stage where I have built in slots for a micro servo to fit in to pull the arm pieces together, at the right time, via some fishing rod wire or equivalent. This is the stage at which I chose to design my wrist joint to the palm. The idea was to have a curved bar stretch out from underneath the arm that would have an extended holder for the potentiometer. This potentiometer would then slide into a holder made out of a block that I would then merge with the palm and curve the edges on the inside so that I would hardly feel it when wearing the gloves. The bar would fit into a rail that curved around the bottom of the lower arm and I would allow some leeway for the bar to move in and out. Next I need to really work on making the lower and upper arm thinner but of course I'll be having issue with where the servo will fit.
Designing the suit - The upper arm
For the elbow joint I plan for a couple of cylinder attached to the bottom sliding piece to lock into the outer cylinders of the lower arm, on the elbow cover. I only plan the joint to be made with a magnet glue into each cylinder for a simple magnetic bond so I can break the joint easily for when I take the suit apart again. I don't have too much else to say about this piece as it isn't complete yet but by the next update I plan for it to be finished, so stay tuned.
Designing the mannequin?
The Summary
So I'll be posting a new update every month released closer to the end than the beginning. I'm not gonna say a specific date but a new Facebook post for each new update will let anyone interested know. Thanks for reading and I look forward to getting back to working on the suit (this first blog has taken aaages to write! Haha.
-Cirtoyt |
Author17 year old college kid who felt his course was too easy for him. Got bored one day and started making a real life iron man suit. Archives
June 2017
CategoriesBack to main site:
|